

Hands-on STEAM activities spark student creativity. They can build robots, code games, or design prototypes. But, without a clear way to evaluate them, these projects might just be for fun.
Real educational value comes from more than just grades. Assessment is key to equitable learning and showing true skill growth.
Just saying “all students” are served doesn’t mean equity. Good evaluation finds and breaks down barriers for underrepresented groups. It makes sure every learner can really do well.
A well-made steam project rubric is essential. It matches learning standards and gives clear criteria. This framework shows that all students are truly innovating, inquiring, and working together.
The idea is strong. With the right assessment, guided by clear rubrics and standards, a fun activity becomes a powerful learning experience. It shows real growth and prepares students for their future careers.
Backward Design and Learning Targets
The secret to meaningful student assessment in STEAM is simple: start with the end goal. This method, called backward design, changes how we plan lessons. Instead of picking a fun activity first, we define what students should know and do.
Clear, measurable learning targets are key to any successful technology project. They serve as a blueprint, guiding every task and discussion toward a clear goal.
To create effective targets, we look beyond just knowing facts. A great STEAM project covers four main areas:
- Content Knowledge: Mastering STEM concepts and principles.
- Process Skills: Being good at the engineering design cycle, data analysis, and working together.
- Safety Protocols: Using tools, software, and materials safely and consistently.
- Creative Problem-Solving: Being able to innovate, try new things, and think outside the box.
This approach turns lessons into a connected, standards-aligned challenge. It moves from just doing activities to a full, integrated experience. This is shown in how programs evolve, like moving from “Exploratory” to “Full Immersion.”
School leaders are key in making this happen. They support a curriculum focused on solving problems or working on projects. This lets teachers plan with the end in mind, linking daily work to long-term goals.
Using NGSS alignment comes naturally from backward design. Starting with three-dimensional learning targets makes your project’s activities and assessments meet these standards.
Think of it like making a roadmap. Your goal is student mastery. Each learning target is a key checkpoint. Every project step, piece of evidence, and feedback session guides students toward their goal. This ensures every part of the project has a purpose.
Adopting backward design changes your role from managing activities to designing learning. You create a clear path for exploration, letting students own their journey. This careful planning makes a STEAM project truly great.
Rubric Templates (Concepts, Process, Safety, Creativity)
Effective rubrics for STEAM projects set clear expectations in key areas. A good steam project rubric acts as a guide for students and teachers. It focuses on strengths and areas for improvement, not just a final grade.
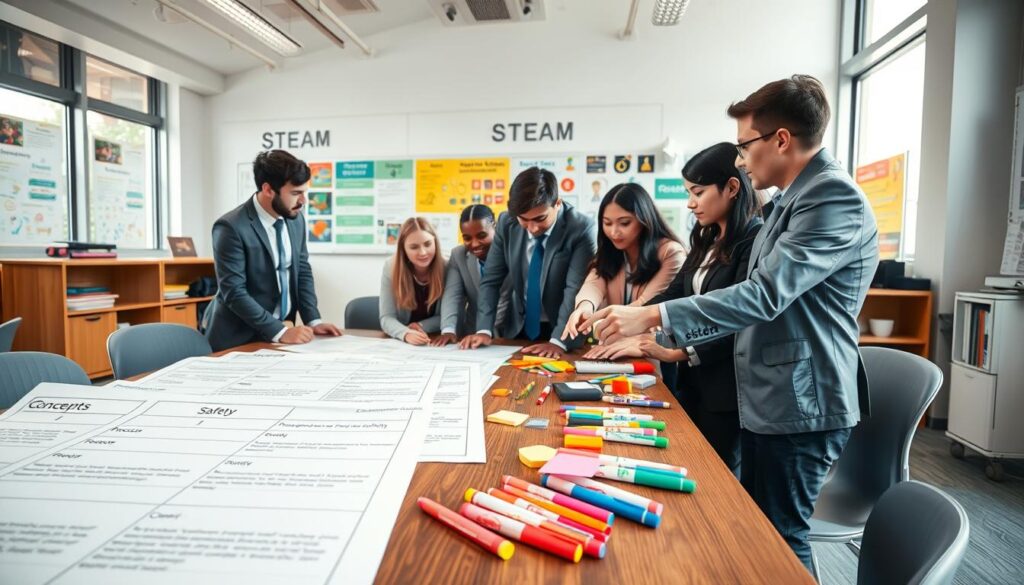
Using a model like “Emerging, Establishing, Executing” helps clarify expectations. This approach, inspired by state STEM frameworks, shows what student work looks like at each level. It aims to highlight specific behaviors, not vague qualities.
Conceptual Understanding
This part checks how well students understand and apply scientific and mathematical principles. It goes beyond just memorizing to see if they really get it.
- Emerging: The student knows basic concepts but can’t explain their project’s relevance.
- Establishing: The student explains key concepts well and shows how they’re used in the project.
- Executing: The student shows deep understanding. They can explain why certain concepts were chosen and predict outcomes.
Process & Design Skills
This section looks at how students solve problems and manage their projects. It covers the steam project rubric lifecycle.
- Emerging: The student follows steps without much deviation or reflection.
- Establishing: The team documents their design process and makes adjustments as needed.
- Executing: The team uses a dynamic design cycle. They test prototypes, use data to improve, and show an entrepreneurial spirit.
Safety & Responsibility
Safety is key in technology projects. This part checks if students follow safe practices and use tools and materials responsibly.
- Emerging: Safety rules are followed only with close supervision.
- Establishing: The student uses safety gear and handles tools well. They need little supervision for standard tasks.
- Executing: The student is a safety role model. They identify hazards, follow guidelines, and manage digital security.
Creativity & Innovation
This part looks at originality and new ideas. It rewards unique solutions and creative problem-solving.
- Emerging: The project meets basic needs but lacks personal touch or new ideas.
- Establishing: The project has unique elements or personal touches. It goes beyond the basic instructions.
- Executing: The project shows a lot of innovation. It offers a new solution or uses knowledge in a surprising way.
By defining these four areas with clear criteria, your steam project rubric becomes a powerful tool. It helps students know what to aim for and lets you see their growth in all areas of STEAM.
Evidence Types: Data Tables, Notebooks, Videos, CAD Files
Teachers can see more than grades by using different types of student work. In STEAM projects, the final product is just part of the story. The real learning happens in the process.
A project portfolio collects many kinds of evidence. It shows how students learn and grow. This helps teachers understand students better.
These artifacts are important in education. They show how students work and learn. This makes assessment more complete and meaningful.
Key Artifacts for Authentic Assessment
Setting up projects to collect these evidence types makes assessment easier. Each type shows different skills and knowledge.
Engineering Notebooks and Journals: These are the heart of a project. They record daily work, changes, and insights. A notebook shows how students think and solve problems.
Data Tables and Graphs: These show the scientific side of a project. They prove experiments and analysis. They show students can measure and understand data.
Video Journals and Presentations: Videos capture moments that words can’t. They show how students communicate and explain their work. This is great for checking both technical and soft skills.
CAD Files and Digital Models: In today’s tech, CAD files are key. They show design skills and spatial thinking. They prove a student’s ability to plan and create.
A key STEM education report says using these artifacts is important. It helps teachers see the whole picture of a student’s learning. They can see math, science, engineering, and art in one student’s work.
Creating a project portfolio needs planning. Teachers should guide students to keep a notebook, record data, make videos, and save digital files. This makes the evidence collection part of the project, not extra work. It leads to a detailed and fair assessment.
Self- and Peer-Assessment Protocols
Self- and peer-assessment are more than just ways to check work. They help create a learning environment where everyone is involved. By using clear steps, students get to learn from each other’s projects.
Teachers and students working together is key in STEM fields. This teamwork needs a balance of group effort and personal responsibility. Self- and peer-assessment help achieve this balance. They give teachers useful data and teach students important skills.
Implementing Structured Protocols for Accountability
Good protocols help students go beyond saying “my partner did a good job.” They encourage deep thinking and specific feedback. Models like calibrated peer review, contribution trackers, and team retrospectives are effective. They promote growth and clear responsibility.
Calibrated Peer Review helps students learn to judge work against a standard. First, the teacher scores a sample project. Then, the class talks about the scoring. Students use this knowledge to review their peers’ work. This method makes feedback fair and consistent.
Contribution Trackers help track each person’s work in a group. Students log tasks, challenges, and time spent. This shows everyone’s effort clearly. It’s a key way to grade group work fairly.
Team Retrospectives are meetings to reflect on a project’s progress or end. Teams discuss what worked, what didn’t, and how to improve. This helps students think about their own learning. It makes the project experience valuable for learning.
| Protocol | Primary Focus | Key Tool / Output | Professional Skill Developed |
|---|---|---|---|
| Calibrated Peer Review | Applying consistent standards to peer work | Rubric-based evaluation form | Critical analysis, constructive feedback |
| Contribution Tracker | Documenting individual effort and tasks | Shared log or digital spreadsheet | Personal accountability, project management |
| Team Retrospective | Reflecting on group process and outcomes | Meeting notes with action items | Metacognition, collaborative problem-solving |

These protocols give teachers the data they need. A student’s self-review, peer feedback, and tracker data show a complete picture. This is more accurate than just a teacher’s view. It helps solve the big challenge of assessing collaboration.
It’s important to teach these protocols. Students learn to give feedback that is specific, kind, and helpful. They also learn to evaluate their own work against clear criteria. These skills are vital in any career.
These strategies make grading group work fairer and more educational. They change the classroom culture to one of shared learning. Students become active in assessment, preparing them for lifelong learning and teamwork.
Aligning with NGSS, ISTE, and CTE Standards
Connecting classroom STEAM activities to broader standards makes projects more meaningful. It shows your program’s quality and gets support from everyone. When you link a project to NGSS, ISTE, and CTE, it proves your students meet high standards.
Studies say STEM content must match standards for a smooth transition to college and careers. CTE pathways blend academic and technical skills. Your rubrics should reflect this blend, linking classroom work to real-world skills.
A Practical Guide to Standards Mapping
Begin by breaking down the main practices in each framework. For NGSS alignment, focus on eight Science and Engineering Practices. For example, analyzing data and designing solutions are key. A student’s data table and project notebook show their skills in these areas.
The ISTE Standards for Students focus on digital age skills. The “Innovative Designer” strand promotes computational thinking and prototyping. A student’s CAD file for a 3D-printed component shows their design skills. Their project video citing sources shows digital citizenship.
For CTE pathways, look at standards for career clusters like Engineering or Information Technology. These list specific technical skills. A robotics project can meet NGSS, ISTE, and CTE standards, showing the power of project-based learning.
Here’s a practical example for a common project:
- Project: Building a water filtration system.
- NGSS Practice: Constructing explanations and designing solutions.
- ISTE Standard: Innovative Designer – students develop, test, and refine prototypes.
- CTE Connection: Environmental engineering technology pathway, focusing on system design.
Your rubric criteria for “design process” and “solution efficacy” can be directly linked to these standards. This clarity shows students the “why” behind their work. It also provides a solid basis for grades.
This alignment does more than just meet requirements. It shows student technology projects as part of a CTE pathways journey. It empowers you to explain the value of hands-on learning in a way everyone can understand. This strengthens your program and boosts student success.
Grading Group Work Fairly
Modern STEAM education uses a ‘blended approach’ that values both technical skills and understanding. When grading group projects, it’s not about giving everyone the same score. Instead, it’s about creating a system that shows the team’s effort and each member’s unique contribution.
Grading Group Work Fairly
For fair grading group work, start with a clear plan. Share a detailed rubric with students to show what success looks like. This makes the assessment process clear and helps everyone know what’s expected.
Think of grading like a schoolwide project versus a classroom effort. The final project is the school’s goal. Individual work is what helps achieve that goal. A fair grading system looks at both levels.
Educators have come up with several ways to balance grading. These methods go beyond simple peer ratings. They use a structured, evidence-based approach to assessing collaborative projects.
| Grading Model | Core Description | Best For |
|---|---|---|
| Split Grade Model | Assigns a percentage of the total grade to the group product (e.g., 70%) and a separate percentage to individual process evidence (e.g., 30%). | Projects with a tangible final deliverable and required individual research notes, CAD files, or video logs. |
| Role-Specific Rubric | Uses tailored rubrics for different team roles (e.g., Project Manager, Data Analyst, Prototype Engineer) aligned to common learning targets. | Long-term, complex projects where students take on specialized, sustained roles within the team. |
| Individual Defense Interview | Each student participates in a short, structured interview to explain the group’s work, their specific contributions, and the key concepts learned. | Verifying deep individual understanding and mitigating issues where one student may have carried the team. |
For example, a role-specific rubric grades students based on their role. The safety manager is judged on safety, while the creativity manager is judged on innovation. This approach mirrors real-world accountability. A brief individual defense interview lets a student show their understanding of the team’s work, separate from the group’s presentation.
Grading group work fairly needs a multi-faceted approach. By using a clear rubric and ways to show individual learning, educators can give grades that are fair and meaningful. This approach shows that everyone’s contribution is valued, not just the final product.
Feedback Cycles and Revision
Imagine a classroom where grading boosts student growth through feedback. This is what happens when you see assessment as a tool for growth, not just a final score. By creating feedback loops, you turn a steam project rubric into a guide for better work.
Designing Iterative Check-Ins
Feedback should start early, not just at the end. Have mid-point check-ins where students review their work against the rubric. This approach is like the “Partial Immersion” model in professional development, where support is ongoing.
Teachers can spot where students need help early. Students know exactly what to work on next. This approach helps avoid last-minute stress and boosts confidence.
Structured Critique and Conferencing
Go beyond just comments by having formal critique sessions. Peer feedback, guided by the rubric, teaches students to give and receive feedback well. Then, have brief teacher-student conferences.
These one-on-one talks are your “Full Immersion” moments. They offer deep reflection and targeted advice. The goal is to have a real conversation about the work, not just a lecture.
These cycles change the classroom culture. The focus shifts from grades to the learning process. The rubric becomes a tool for improvement, and every feedback is an opportunity to get better.
Embedding the Engineering Mindset
This process mirrors the engineering design cycle. Engineers constantly prototype, test, get feedback, and revise. Your classroom should work the same way.
Through multiple feedback loops, students learn that revision is not failure. It’s the path to success. This mindset is key for all STEAM projects, from simple to complex.
Fair grading group work also benefits from these cycles. By checking individual contributions at different times, you understand team dynamics better. This helps make grading more fair.
In the end, a system based on feedback and revision makes learning clear. It celebrates progress and turns assessment into a dialogue between teacher and student.
Managing Portfolios (Digital/Physical)
A project portfolio, whether digital or physical, is key for students. It shows their growth and skills. For teachers, managing these portfolios is important for students’ future success.
Portfolios are often needed for program or school recognition. They are perfect for showing the learning in CTE pathways. A well-put-together portfolio shows a student’s skills and readiness for the next step.
Choosing Your Platform: Digital vs. Physical
The first choice is whether to use digital or physical portfolios. Each has its own benefits for different types of projects.
Digital portfolios are flexible and easy to share. They can include videos, CAD files, and interactive data. They are great for ongoing updates.
Physical portfolios offer a hands-on experience. They are good for showing detailed drawings and prototypes. Assembling the portfolio can help students reflect more deeply.
The table below shows the main differences to help you decide:
| Feature | Digital Portfolio | Physical Portfolio |
|---|---|---|
| Best For Evidence Type | Videos, CAD files, dynamic data, websites | 3D models, detailed sketches, annotated notebooks |
| Access & Sharing | Instant, global access via link; easy duplication | In-person viewing; requires physical handling |
| Revision & Updates | Simple and non-destructive; maintains version history | Can be messy; often requires reprinting or reassembly |
| Long-term Preservation | Risk of link rot or platform obsolescence | Subject to physical damage, loss, or degradation |
| Ideal Audience | Remote interviews, college applications, digital archives | Career fairs, student-led conferences, local exhibitions |
Strategies for Effective Portfolio Curation
Managing a portfolio is more than just storing work. It’s about choosing, reflecting, and presenting the best pieces. Without a plan, portfolios can become disorganized.
Here are some tips for keeping your portfolio organized:
- Create Portfolio Checkpoints: Schedule 3-4 dedicated work sessions per semester. Use these to review progress, select key artifacts, and write reflective captions.
- Use a Consistent Organizational Framework: Mandate sections like “Project Proposals,” “Process Documentation,” “Final Artifacts,” and “Personal Reflections.” This creates a familiar narrative for reviewers.
- Teach Curation, Not Collection: Emphasize quality over quantity. Students should justify why each piece is included and what it demonstrates about their skills.
- Leverage the Portfolio as a Dynamic Resume: Encourage students to update their portfolio with new skills, certifications, or internship experiences. This shifts the mindset from a school project to a professional tool.
The Portfolio as a Pathway Capstone
In a CTE pathways program, the portfolio is the final proof of learning. It shows progress from basic to advanced projects.
This makes it very important for several key moments:
For student-led conferences, the portfolio is the agenda. Students use their work to explain their learning journey to families.
When applying for internships or apprenticeships, a professional portfolio stands out. It shows real skills, not just courses.
For post-secondary education or direct-to-industry placement, a portfolio proves readiness. It shows more than grades, it shows applied skills.
By seeing the portfolio as a career-launching capstone, students have a strong reason to invest in it. The details of organizing files become the foundation of their future.
Communicating Outcomes to Families
When teachers share rubric and portfolio language with parents, they start a powerful partnership. This isn’t just about grades. It’s about understanding and supporting the hard work of STEAM projects. Strong family support turns assessment data into a story of growth.
Good talks match community efforts, like advisory groups and school boards. They make sure everyone sees the value of what students learn. This section offers ways to share student success with families.
Practical Strategies for Clear Dialogue
Changing from technical talk to family-friendly chats needs careful steps. The goal is to make the learning journey clear. A student’s project portfolio is your best tool for this.
- Portfolio-Centered Conferences: Use the project portfolio as the main topic for meetings with parents. Show the design process, data, and final thoughts. This makes complex criteria easy to understand.
- Project Showcase Nights: Host events where students show their work to families and others. This focuses on skills, not just grades. It makes families feel like they’re part of the audience.
- Narrative Progress Reports: Add short, story-like summaries to regular report cards. Explain what a “Proficient” score in “Collaboration” means for their child. Use simple language without technical terms.
- Structured Community Updates: Share project results in a way that’s easy to understand with school groups. This shows how STEAM work helps meet big educational goals and gets support for the program.
Translating Rubric Scores into Stories
A “4” in creativity might not mean much to a parent. Instead, talk about how their child solved a problem in a new way. For example, “Your child showed great creativity by coming up with three unique ideas before making the final model.”
This way of talking does more than explain grades. It shows families the value of skills like resilience, critical thinking, and innovation.
| Communication Method | Primary Purpose | Best For Highlighting |
|---|---|---|
| Portfolio Conference | Deep, individual understanding of process | Growth over time, specific skill mastery |
| Showcase Night | Celebration and public presentation | Final products, communication skills |
| Narrative Report | Clear, written explanation of outcomes | Rubric translation, personalized feedback |
| Community Briefing | Building program advocacy and support | Alignment with standards, program success |
Being consistent in your messages is key. Whether talking to one family or a group, focus on the learning journey. A well-kept project portfolio is the proof for all these talks.
Clear communication turns assessment into a starting point for deeper involvement. It helps families see the value of the engineering design cycle, not just grades. This partnership is key for keeping STEAM programs strong and supported.
Accommodations and UDL Strategies
How can we make sure a robotics project is just as accessible to a student with dyslexia as to a coding whiz? We need more than just simple fixes. Universal Design for Learning (UDL) offers a solution, making sure all students can understand and show their knowledge of complex tech concepts.
This method uses equity rubrics and is key for NGSS alignment. If science and engineering practices are only tested one way, some students get left out. UDL changes this by making assessments flexible from the start.
Applying UDL’s Three Principles
Universal Design for Learning has three main parts. Each part has strategies to make STEAM project assessments fair and challenging.
Multiple Means of Representation focuses on how we share information and criteria. Not all students learn the same way from written instructions.
- Make rubric criteria simple, offer audio or video summaries, or use graphic organizers.
- Provide annotated examples that highlight important features for different learning styles.
Multiple Means of Action & Expression lets students show their learning in different ways. This is where creativity meets responsibility.
A student might give a traditional lab report, a video diary, a model with diagrams, or a coded simulation. The goal is to match the evidence to the learning target, not the format.
Multiple Means of Engagement boosts student motivation and keeps them engaged. Using strategies that are culturally relevant and hands-on is key.
Assign group roles that match different strengths: a project manager, a data recorder, a builder, and a designer. Let students choose their project topics within the unit’s scope. This makes them more invested.
From Differentiation to Designed Inclusion
While differentiation focuses on individual needs, UDL builds choices into assessments. This approach is powerful.
For example, instead of just a written engineering notebook, assessments could accept digital portfolios. This ensures NGSS alignment by measuring mastery of practices, not just writing skills.
Concrete accommodations are also important for specific students. These might include extra time, text-to-speech software, or modified tools. When added to UDL, these supports create a seamless, inclusive system.
Aligning with Equity and Broad Participation
Equity-focused standards require STEM content to be accessible to diverse students. A UDL-based assessment model meets this need.
This approach broadens participation by removing barriers. When students from underrepresented groups see many ways to succeed, they feel more included and capable. This supports NGSS alignment by making science and engineering practices open to all.
In the end, designing assessments with UDL is a matter of educational justice. It shows that every student’s way of learning and showing knowledge is valuable. This mindset is essential for fair NGSS alignment and creates a STEAM classroom where all innovators can flourish.
Exemplars and Calibration for Consistency
The last step in making a reliable assessment system is ensuring it’s consistent. Rubrics and standards need every teacher to apply them the same way. This is key for keeping quality high in STEAM and CTE programs.
Calibration in Practice
Calibration meetings use real examples of student work to support consistent evaluation. These samples demonstrate different levels of performance, such as Emerging, Establishing, and Executing. Teachers score the examples using a shared rubric and then discuss their reasoning to align expectations.
This collaborative process helps everyone understand what quality performance looks like. It transforms subjective opinions into a reliable system for measuring student growth. For Career and Technical Education (CTE) pathways to succeed across programs, this fidelity of implementation is essential. Clear goals and consistent scoring create fairness and transparency for all learners, similar to standardized evaluation practices used in industries that rely on precision, including environments involving industrial manufacturing equipment.
Calibration strengthens assessment practices by ensuring the framework becomes more than a written guideline. Instead, it evolves into a consistent professional practice that accurately reflects student progress and achievement year after year.
