

In today’s world, STEM is key for the next innovators. But we can’t forget the “A” for Arts. It’s a must for true innovation. So, how do we make these ideas fun for our kids?
Many educational kits don’t cut it. They look good but offer little. Parents and kids often feel let down. It’s like watching something fizz once and calling it science.
But there’s a bright side: making your own DIY STEM kit is a smart move. It saves money and lets you focus on real learning. This guide will show you how to pick the right parts and manage the fun chaos that follows.
Kit Planning: Determining Learning Objectives and Age Appropriateness
When you’re picking out DIY STEAM education kits, knowing what you want to achieve is key. Before you start shopping, take a moment to think. What do you hope to learn?
Learning goals are the base of any educational kit. Are you starting with simple circuits? Exploring how code works with real-world things? Or diving into chemistry? Each goal needs its own set of materials and methods.
Now, let’s talk about making sure the kit fits the age of the learner. This part is both fun and challenging. There are three main types of learners you might find:
- Instant Creator: Younger learners love seeing things happen right away. They enjoy tools like the Micro:bit’s 5×5 LED matrix, which shows code as lights blink instantly.
- Little Engineer: These kids love making things that actually do something. They want to build systems, like automatic plant-waterers, not just LED lights.
- Digital Artist: These learners are all about visuals and interactive fun. They need tools like full-color touchscreens and programmable RGB lights to show their creativity.
When you’re planning your kit, make sure it’s just right for your learners. Too simple and they might get bored. Too hard and they’ll get frustrated. Finding that perfect spot is what makes learning fun.
Essential Components: Tools, Materials, and Equipment for Steam Activities
Let’s explore the key parts that make your STEAM kit amazing. The heart of any good kit is its tools and materials. They’re like the songs in your favorite playlist, each one important for a great experience.
The microcontroller is the brain of your kit. The Micro:bit All-in-One Kit is perfect for beginners. It’s easy to use and lets you focus on being creative, like playing with digital LEGOs.
For those who love engineering, the Arduino All-in-One Kit is a great choice. It has six expansion ports and lots of onboard modules. This makes learning projects feel natural and exciting.
The Raspberry Pi Pico 2 is also a standout. It has a powerful dual-core processor and a beautiful 2.4-inch touchscreen. It’s great for teaching UI design in a fun way.
You’ll also need sensors, actuators, and connectivity tools. It’s better to have a few high-quality items than many cheap ones. A reliable servo motor is worth more than five cheap ones.
Don’t forget basic hand tools like wire strippers and screwdrivers. And make sure you have a good storage solution from the start. It helps keep your projects organized and on track.
| Component | Description | Use Case |
|---|---|---|
| Micro:bit All-in-One Kit | Beginner-friendly microcontroller with no wiring | Ideal for simple coding projects |
| Arduino All-in-One Kit | Versatile board with expansion ports | Perfect for intermediate engineering projects |
| Raspberry Pi Pico 2 | Dual-core processor with touchscreen | Great for UI design and advanced coding |
Safety Supplies: First Aid, Protective Equipment, and Emergency Procedures
Safety supplies are not just an afterthought; they are the backbone of any DIY STEAM education kit. You wouldn’t send a knight into battle without armor, right? The same principle applies here. Equip your budding engineers with the right gear to keep them safe and sound.
Start with the essentials:
- Safety glasses: Ensure they fit properly. Adult-sized goggles on a nine-year-old? That’s a recipe for disaster.
- Nitrile gloves: Perfect for chemical handling. Latex allergies are real, and you don’t want to discover that during an experiment.
- A well-stocked first aid kit: Include burn gel for soldering projects, eyewash solution for liquid mishaps, and bandages in sizes that accommodate small fingers.
Next, emergency procedures deserve their own laminated card. A vague “be careful” isn’t going to cut it when things go sideways. Here’s what you need:
- What to do if someone ingests something hazardous.
- Location of the nearest eyewash station or sink.
- Protocol for electrical shock—whatever unlikely that may seem.
These aren’t just paranoid hypotheticals; they can mean the difference between a minor incident and a trip to urgent care. For educators, documentation is key. Insurance forms and administrative inquiries tend to appear right when your memory is fuzzy.
Parents building kits at home, take note: your kitchen table laboratory deserves the same safety consideration as a professional makerspace. The goal isn’t fear—it’s the confidence that comes from knowing you’ve anticipated the worst while expecting the best.
Instruction Manual Creation: Writing Clear, Student-Friendly Directions
An effective instruction manual turns a STEAM kit into an exciting learning journey. Writing instructions for a DIY educational STEAM kit is a special skill. Many kits fail because their manuals are hard to understand.
My secret is to write as if you’re explaining to a friend who’s had one cup of coffee. Start with the “why” before the “how.” For example, explain what a proximity sensor does and why it’s useful before showing how to build an alarm.
Visuals are key. Diagrams help show how things fit together better than words. Number your steps clearly, focusing on one action per step.
Include troubleshooting tips to help with common problems. If a child’s LED doesn’t light up, tell them to check if it’s in the right place. Show what the project should look like at key points to avoid mistakes.
Test your instructions on someone new to the project. You’ll learn how clear your steps really are.
| Step | Action | Expected Outcome |
|---|---|---|
| 1 | Connect the red wire to the 5V pin | Power supply is established |
| 2 | Attach the sensor to the breadboard | Sensor is secured and ready |
| 3 | Open your IDE | Programming environment is ready |
For more teaching resources, check out these lesson plans that can complement your educational STEAM kit.
Video Supplements: Creating Instructional Videos for Complex Procedures
For tricky tasks, nothing beats a clear instructional video in your DIY STEAM kit. Some procedures are hard to explain in words. Take soldering, for example. You can write “heat the joint, not the solder” until your keyboard wears out, but nothing replaces watching someone do it correctly.
Video supplements fill this gap, but keep them short. A three-minute video showing how to strip a wire without nicking the conductor is far more effective than a fifteen-minute epic with an animated intro sequence and outdated background music. I’ve learned this the hard way: script your videos. The unscripted approach often leads to rambling tangents about your personal history with breadboards that no one cares about.
Show the procedure from the learner’s perspective. Position your camera where their eyes would be, not where it’s convenient for your tripod. For coding demonstrations, screen recordings with visible cursor movements and deliberate typing speed are key. Watching someone’s mouse dart around at warp speed while they mutter “just do this and then that” is the educational equivalent of a magician refusing to reveal the trick.
Don’t forget to include closed captions. They are essential for accessibility and cater to learners who process written information differently than spoken. Host your videos on platforms that don’t serve unskippable ads before educational content—nothing disrupts learning like a commercial for luxury sedans interrupting a tutorial on servo calibration.
Lastly, link videos to specific steps in your printed manual via QR codes. It’s 2024; we can have nice things.
Storage Solutions: Organizing Kit Components for Easy Access and Maintenance
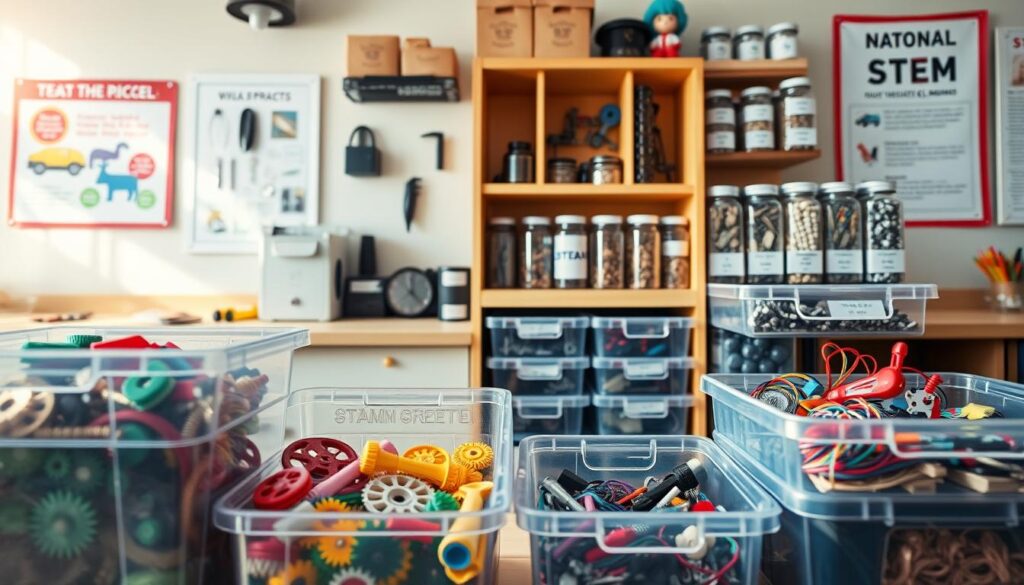
Disorganized storage can turn a creative classroom into chaos. The state of your storage is key to your DIY STEAM kit’s success. Digging through a pile of components shows the need for a solid storage strategy.
Imagine finding a specific resistor in a makerspace like an archaeological dig. Your storage solution is essential, not just an afterthought. Everything should be easy to see and reach without moving other items. Cute little drawers with labels are great, but deep bins are not.
Get compartmentalized containers with adjustable dividers. Label each item clearly, like “10kΩ Resistor.” This helps everyone, even young learners who can match colors to steps.
For microcontrollers and sensitive electronics, anti-static storage is a must. It keeps your Arduino working, not as a paperweight. A sturdy tool bag is better than a cardboard box, even if it costs a bit more.
Make an inventory checklist and attach it to the container lid. It’s a lifesaver when you realize you’re missing a key sensor. Do monthly inventory checks to keep your kit organized.
Think of storage as the user interface for your educational system. Good UI makes everything else better.
| Storage Solution | Benefits | Best For |
|---|---|---|
| Compartmentalized Containers | Adjustable dividers for custom organization | All components |
| Labeled Drawers | Easy access and visibility | Small parts |
| Tool Bags | Portability and protection | Traveling kits |
| Anti-Static Storage | Prevents damage to electronics | Microcontrollers |
Budget Alternatives: Cost-Effective Substitutions for Expensive Equipment
High-quality educational STEAM kits don’t have to be expensive. Many “specialized” STEM tools are just generic parts in fancy packaging. You can make an effective STEAM kit without spending a lot.
Microcontrollers are a good example. Instead of buying Arduino boards, look for Arduino-compatible clones. These cost less than a third of the price but work just as well. They have the same chip and work with the Arduino IDE.
Sensors are another area where you can save money. That $15 “educational” temperature sensor is basically a DS18B20 in plastic. You can find it for $2-3 by buying directly from suppliers. Also, buy breadboards, jumper wires, resistors, and LEDs in bulk to save a lot.
Don’t spend too much on soldering stations. A $30 temperature-controlled iron with interchangeable tips is perfect for beginners. It’s a good investment that won’t break the bank.
But safety equipment is a different story. Cheap safety glasses that scratch and distort vision are not worth it. Spending a bit more on quality safety gear teaches kids the importance of safety.
For software, use open-source tools. Tinkercad for 3D design, KiCad for PCB layout, and Inkscape for vector graphics are free and top-notch. They’re not just cheap alternatives; they’re essential for any STEAM kit.
Also, many manufacturers offer discounts for educators. Just send an email explaining your educational needs to get these discounts. It’s a great way to stretch your budget.
Customization Options: Adapting Kits for Different Skill Levels
Making a STEAM kit is like creating a playlist that fits each learner’s style. It’s not about one size fits all in education. The joy of making your own DIY STEM kit is in the customization, not just as an extra feature.
For the “Instant Creator,” who loves quick results, keep it simple. Remove any complicated parts. Use pre-wired parts and alligator clips instead of breadboards. Choose block-based programming for instant feedback. The Micro:bit’s LED matrix makes “Hello World” come alive.
The “Little Engineer” wants more complexity. Turn a simple LED circuit into a lesson on Ohm’s Law. Expand motor projects to explore gear ratios and torque. The Arduino platform grows with the learner, from simple to complex projects.
The “Digital Artist” needs beauty in their STEM kit. Include programmable RGB LEDs, touchscreens, and sound modules. These are not just extras; they open doors for creative minds. The Pico 2’s touchscreen makes coding a hands-on experience.
Make challenge cards for each project at three levels: green for basics, yellow for application, and red for creativity. This lets learners choose their own path. It’s empowering, and they often reach for harder challenges because it feels right.
Distribution Strategies: Sharing Kits Within Schools and Community Groups
So, you’ve made the perfect DIY STEAM education kit. Now, how do you share it with others? Getting your kit to the right hands is important. Let’s explore ways to share your educational kits effectively.
In classrooms, the “kit-per-pair” model works well. It encourages teamwork and learning from each other. But, it’s important to keep track of everything. Number your kits and check them regularly to avoid missing parts.
For schools with kits for different grades, a central checkout system is a good idea. It’s like a library system. Use a shared Google Calendar to avoid scheduling problems.
Community groups and homeschool co-ops have their own challenges. A kit that moves around every two weeks can be helpful. Include a form to report on the kit’s condition. This helps keep track of everything.
For wider distribution, consider working with local libraries. Many libraries have “Library of Things” collections. Your kit could reach many families through these libraries.
Don’t forget about digital resources. Make sure instructions and project ideas are easy to find online. A simple website or shared drive can help keep everyone on track.
| Distribution Method | Advantages | Considerations |
|---|---|---|
| Kit-per-pair model | Encourages collaboration | Requires accountability checks |
| Centralized checkout system | Organized and efficient | Needs clear scheduling |
| Rotating kit model | Involves community | Tracking usage can be challenging |
| Library partnerships | Utilizes existing infrastructure | May require negotiation |
| Digital resources | Accessible to all | Requires ongoing updates |
Assessment Tools: Measuring Learning Outcomes and Kit Effectiveness
To see if your STEAM kit is working, we need to rethink success. Traditional tests like multiple-choice questions don’t show the hands-on learning these kits offer. We need to look deeper.
Begin by making rubrics that check the process, not just the end result. Ask if the student solved problems on their own before asking for help. Did they improve their design after it didn’t work at first? These actions show more about STEM skills than just making something work.
Try using portfolio-based assessments. Have students document their projects with photos, videos, and written thoughts. This helps them think about their learning. When they explain why they chose something, they learn more than just if it worked.
For younger students, simple self-assessment tools can be very telling. Emoji scales or “I can…” lists let students show what they know. A quiet student who says they’re “confused” about I2C is giving you important feedback that a simple test can’t.

Also, track how often certain parts of the kit are used. Which components are most popular? Which projects do students keep trying? This shows if your kit really meets what students want to learn.
For programs funded by grants or reports to administrators, collect both numbers and stories. Use data like how many finished and what they learned, along with student stories and photos. This tells a fuller story than just numbers.
The real goal of assessment is not just to see if students know something. It’s if they want to learn more on their own. To find out about affordable STEAM experiments you can do at home, check out this resource.
| Assessment Method | Description | Benefits |
|---|---|---|
| Rubrics | Criteria-based evaluation of student processes and outcomes. | Encourages critical thinking and self-reflection. |
| Portfolios | Collection of student work over time. | Showcases growth and understanding. |
| Self-Assessment Tools | Simple checklists or emoji scales for student feedback. | Provides insight into student confidence and comprehension. |
Maintenance Schedule: Keeping Kit Components Safe and Functional
Every masterpiece needs care, and your DIY STEAM education kit is no different. Just like a garden needs tending, a well-maintained kit ensures creativity blooms without interruption. Components don’t last forever, and it’s key to keep everything in top shape.
To start, I recommend a quick two-minute visual sweep after every use. Check for:
- Obvious damage
- Missing pieces
- Batteries left connected (the silent killer of electronics everywhere)
Once a month, dive deeper. Test every sensor with a known working sketch. Make sure motors spin smoothly—no grinding coffee beans sounds, please! Also, inspect wire insulation for cracks; exposed conductors are accidents waiting to happen.
Speaking of batteries, they deserve special attention. Rechargeable batteries can develop memory effects and lose capacity over time. Alkaline batteries left in devices corrode terminals, creating a white crystalline crust that’s both ugly and conductive in all the wrong ways. Establish a battery removal policy: if the kit won’t be used for more than a week, batteries come out. Period.
For soldering equipment, tip maintenance is key. Clean and tin tips after each session. Replace them when the plating wears through—using a damaged tip is false economy that ruins boards and frustrates learners.
Consider keeping a maintenance log, whether digital or physical, to track replacements and repairs. Patterns will emerge; if you’re replacing the same servo motor every three months, the issue might be in how it’s being used. Perhaps that project needs a higher-torque alternative.
Lastly, budget for consumables annually. Resistors, LEDs, jumper wires, and batteries aren’t one-time purchases. Allocate roughly 15-20% of your initial kit cost for annual replenishment. It’s cheaper than rebuilding from scratch when everything fails simultaneously.
Think of maintenance as respect for future learners. The kit you maintain today is the kit that works flawlessly for the student who discovers their passion for engineering six months from now.
| Component | Maintenance Frequency | Common Issues |
|---|---|---|
| Batteries | After each use | Corrosion, capacity loss |
| Sensors | Monthly | Inaccurate readings |
| Motors | Monthly | Grinding noises |
| Soldering Tips | After each session | Worn plating |
Expansion Possibilities: Adding New Activities and Advanced Projects
A DIY STEM kit is a living thing that grows and changes. It starts with basic parts but can become so much more. The Arduino’s expansion ports are not just for looks. They open the door to exciting future projects.
What’s next after simple sensors? How about adding humidity and air quality sensors? This turns a basic weather station into a full environmental monitor. Moving from simple projects to more complex ones, like a drawing robot, is easier than you think. Your kit can be the starting point for endless creativity.
Resources like Hackster.io’s Pico Zone and Raspberry Pi forums are gold mines. They’re full of projects and help. When learners share their work, they help others and improve their writing skills. This mix of tech and creativity is powerful.
Expansion packs can focus on areas like robotics or home automation. Each pack comes with new parts and guides. This way, your kit keeps giving you new things to learn.
The real aim is to let learners create their own projects. Your DIY STEM kit should spark their imagination. It’s not just learning; it’s about exploring and innovating.
