
For years, STEM—Science, Technology, Engineering, and Math—led the way in innovation. Now, a new letter has been added: A for Art. This change marks a big shift in tackling complex projects.
The “A” is not just for looks. It sparks creative problem-solving and builds social awareness. This way, we use our whole brain, leading to a more balanced set of skills.
True STEAM lessons are all about exploring and learning through doing. Working together and getting hands-on is key. This is what makes integrating art into steam projects work.
When art meets engineering, it boosts our thinking in a big way. We get innovations that are both useful and touch the human side. This is what modern design thinking is all about.
What Is STEAM Design?
STEAM design combines art with engineering. It goes beyond STEM by adding beauty to problem-solving. The aim is to create solutions that work well and look great.
Aesthetic engineering is key here. It means colors, shapes, textures, and balance are thought of from the start. They’re not just extras but essential parts that affect how things work and look.
Adding “A” to STEM is smart. Studies show art boosts creative problem-solving. It makes students think outside the box and work together better.
This mix, called aesthetic engineering, doesn’t take away from learning. It makes learning more meaningful. It connects technical ideas to real life in a fun way.
STEAM design mixes logic with creativity in every project. It helps students and professionals make products people love. This approach is highly valued in today’s fast-paced world.
Case Studies: Beautiful Functional Steam Devices
Seeing a concept come to life is the ultimate proof of good design. These case studies show how student teams merge artistic vision with mechanical principles to create stunning, working devices.
One team programmed a small robot to hold a pen and move in precise geometric patterns. This transformed a simple robotics kit into a modern spirograph art machine. The challenge wasn’t just coding the movement. Students had to design a stable arm and a smooth pen holder. The final product created colorful drawings, proving that function can be beautiful.
Another project focused on integrating light. Students built decorative wands with internal circuits using LEDs and copper tape. The goal was an object that felt magical and functional. They shaped the wand’s handle for a comfortable grip and chose translucent materials to diffuse the light softly. The circuit diagram became a blueprint for both electricity and visual impact.
Kinetic art offers another powerful example. A classic balloon-powered car project was reimagined with a sleek, aerodynamic body. Teams tested different shapes in a simple wind tunnel, much like the Formula 1 student projects. They learned how form directly influences performance. The most visually appealing designs often proved to be the fastest and most stable.
Digital tools are key in the planning stages of these builds. 3D modeling software allows designers to visualize complex assemblies before cutting any material. A team can experiment with the housing for their art bot or the aerodynamic shell for their car in a virtual space. This 3D modeling phase saves time and resources. It turns abstract ideas into tangible prototypes that can be rotated, analyzed, and refined. The move from sketch to digital model is a key step in modern STEAM design.
These examples share a common thread. The pursuit of an aesthetic goal—a beautiful drawing, an enchanting glow, a sleek silhouette—forces inventive technical solutions. Technical constraints inspire creative artistic choices. This symbiotic relationship is where true innovation happens, paving the way for more advanced project workflows.
Design Thinking Process for Student Teams
Aesthetic engineering doesn’t happen by accident. It comes from using a human-centered design thinking process. This method helps student teams go from a vague problem to a clear solution. It balances technical needs with artistic vision.
Think of it as a roadmap for innovation. The classic design thinking cycle has five phases: Empathize, Define, Ideate, Prototype, and Test. It matches the Engineering Design Process (ASK, IMAGINE, PLAN, CREATE, IMPROVE). Each stage focuses on both how it works and how it feels.
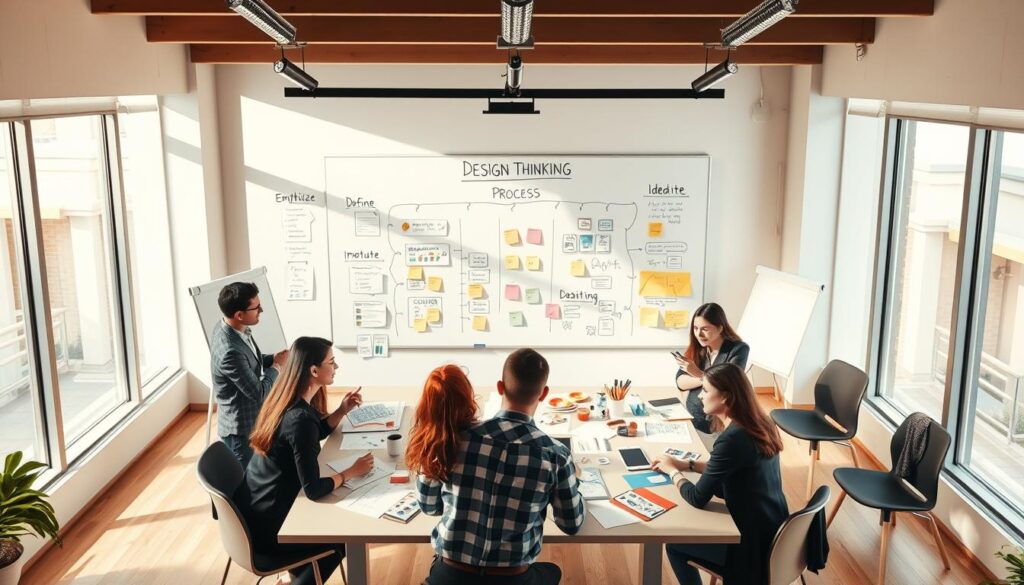
This phase is about understanding the user and the problem. Teams must research before they start designing. Who is this for? What do they really need? For a steam-powered device, is the user a peer, a teacher, or a visitor at a science fair?
In the cardboard person example, the “ASK” stage was about defining the core problem. The team had to figure out the constraints of the material and the goal of stability.
2. Define (IMAGINE)
Here, teams use what they learned to create a clear design challenge. It’s a focused problem statement. For example: “Design a compact, table-top steam engine that is visually intriguing and safe for classroom demonstration.” This statement hints at both function (compact, safe) and form (visually intriguing).
The “Define” stage sets the guardrails for creativity. It answers the question: What are we solving, and for whom?
3. Ideate (PLAN)
This is the brainstorming powerhouse. With a clear goal, teams generate a wide range of solutions—no idea is too wild. Ideation is where aesthetic engineering truly takes flight. Teams ask: What shapes express motion? What colors denote heat or safety? How can the mechanism itself be part of the visual appeal?
Looking at existing solutions, like a hands-on steam engine project, can spark new ideas. For the cardboard person, students imagined various internal support structures (beams, cross-bracing) to solve the stability problem.
4. Prototype (CREATE)
Ideas become tangible. Prototyping is about building simple, fast models to learn. A prototype can be a sketch, a foam model, or a rudimentary working version. The key is to make decisions about materials, assembly, and aesthetics concrete.
This is where the “PLAN” from the engineering process is executed. The cardboard person team built their figure with the chosen internal supports. They saw if their plan for stability worked and got a first look at the figure’s proportions and stance.
5. Test (IMPROVE)
Testing reveals what works and what doesn’t. Teams gather feedback on both performance and user experience. Does the device operate reliably? Is it intuitive to use? Does it look appealing? This feedback fuels the “IMPROVE” stage, creating a loop back to earlier phases.
Maybe the steam engine runs but is noisy and visually cluttered. The team would return to Ideate or Prototype to refine the design. The cardboard person might stand but look awkward, prompting adjustments to its form.
This cyclical, iterative nature is the superpower of design thinking. It transforms a one-time build into a learning journey. The result is solutions that are not only functional but thoughtfully and beautifully crafted.
Aesthetics: Color, Texture, Form, and Branding
In student projects, the drive to finish often grows when the end looks good and shows their personality. This is what aesthetic engineering is all about. It’s about using design to make technical devices look good and feel special.
Think of a colorful polyhedron net or a bright spin art machine. These projects work because they look great. The same goes for steam-powered builds. Making them look good makes them easier to use and remember.
Color: More Than Just Decoration
Choosing colors is key for both looks and use. A red emergency stop button is important for safety. A blue and silver look can make a device seem high-tech.
For student teams, picking colors is a big step. It helps define their project’s character. It also helps guide the user’s eye to important parts.
Texture: Engaging the Sense of Touch
Texture adds a special touch. A textured grip on a valve handle helps prevent slipping. A shiny brass surface shows quality and skill.
Textures can be for grip or just for looks. They add depth and interest. They connect the user to the machine.
Form: Where Style Meets Ergonomics
The shape of a device is its look. Good design should be both useful and stylish. Rounded shapes can feel friendly, while sharp shapes suggest power.
Form also needs to be ergonomic. It should fit well in a hand or on a table. A well-designed form makes a device look like one piece.
Branding: Creating a Cohesive Identity
Even a one-off project can have a brand. A consistent theme or logo makes it stand out. It shows team pride and makes the project memorable.
Branding ties everything together. It makes color, texture, and form tell a story.
Modern aesthetic engineering lets you try things out digitally first. 3D modeling software is key. Teams can try different colors, textures, and shapes without wasting materials.
This digital way helps students feel confident in their design choices. They learn that aesthetics are not just random. They are strategic decisions. The table below helps plan these elements in a project.
| Design Element | Functional Consideration | Aesthetic Goal | Questions for the Team |
|---|---|---|---|
| Color | Safety coding, part identification | Evoke emotion, create visual flow | What feeling should our device project? Do colors indicate function? |
| Texture | Grip, friction, heat dissipation | Add visual depth, convey material quality | Where does the user touch? Should surfaces feel rugged or refined? |
| Form | Ergonomics, component placement, structural integrity | Define style, create a memorable silhouette | Is the shape comfortable to use? Does it look intentionally designed? |
| Branding | Labeling for controls or ports | Establish identity and thematic cohesion | What is our project’s name or story? How is it represented visually? |
By making color, texture, form, and branding key parts of engineering, students improve their work. They go from making something that works to creating something that touches people. This is where art and science meet in every steam-powered project.
Sketching, CAD, and Prototyping Workflows
Every great engineered artifact starts with a simple pencil sketch. This initial mark sets the stage for a detailed digital and physical creation process. For student teams building steam-powered devices, mastering the workflow from sketch to prototype is non-negotiable.
This structured path ensures ideas are both beautiful and functional. It turns abstract concepts into testable realities.
Stage 1: Rapid Sketching for Ideation
The first step is always analog. Students put pen to paper to explore shapes, mechanisms, and overall form. This phase values speed and quantity over perfection.
Quick sketches help visualize multiple solutions before committing to one. They figure out what core pieces their device needs and how they might connect. This freeform exploration is where artistic design and engineering logic first meet.
Stage 2: Digital Refinement with CAD
Once a promising sketch is selected, the work moves into the digital realm. Computer-Aided Design (CAD) software is the critical tool here. It transforms rough sketches into precise, measurable models.
In CAD, every dimension is defined. This precision is essential for parts that must fit together perfectly. 3D modeling allows students to view their design from any angle, check for interferences, and simulate assembly.
This digital model becomes the single source of truth for all subsequent fabrication steps.
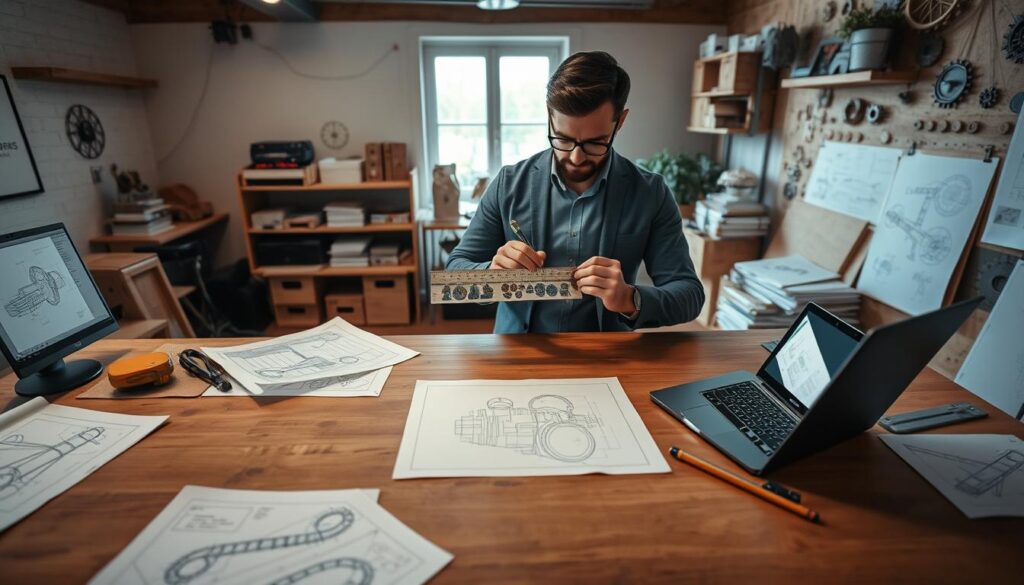
The digital model must become tangible. Prototyping bridges this gap. Modern fabrication methods make this faster and more accurate than ever.
For flat panels, brackets, and decorative elements, laser cutting is ideal. It creates incredibly precise 2D components from materials like wood or acrylic. For complex three-dimensional housings, gears, or connectors, 3D printing is the go-to method.
It builds up layers of plastic to form the part exactly as it exists in the 3D modeling software. This hands-on phase reveals real-world issues weight, balance, and material strength that screens can’t show.
| Workflow Stage | Primary Tool | Key Output | Main Advantage |
|---|---|---|---|
| Sketching | Pencil & Paper | Concept Art & Layouts | Fast, creative exploration of ideas |
| CAD & 3D Modeling | Software (e.g., Fusion 360, Tinkercad) | Precise Digital Model & Files | Exact dimensions and virtual testing |
| Prototyping | 3D Printers, Laser Cutters | Tangible Physical Parts | Real-world validation and fit check |
This workflow is rarely a straight line. Teams often loop back. A prototype might reveal a flaw, sending them back to the CAD model for a tweak. Or a new idea during assembly might inspire a fresh sketch.
This iterative cycle is where true innovation happens. By integrating artistic sketching, technical 3D modeling, and practical laser cutting or printing, students learn to think and build like professional designers.
3D-Printed Housings and Laser-Cut Parts
Teachers and students are now using 3D-printed housings and laser-cut parts. These tools add beauty and precision to STEAM projects. They help turn simple ideas into professional-quality items.
3D printing makes complex, custom enclosures possible. It creates perfect fits for electronic parts, improving both function and safety. These parts can also be artistic, turning a simple box into a work of art.
For flat panels, gears, or detailed designs, laser cutting is the best choice. It cuts or engraves materials with great accuracy. This ensures every piece is the same, which is key for repeat builds. Materials like wood, acrylic, and special cardboard are used.
The power of laser cutting is in its speed and clean cuts. It can make detailed patterns and parts that fit together without glue. This is perfect for making chassis, decorative faces, or functional parts like gears.
These tools make prototyping faster and better. A team can design, print, or cut a part in a day. This quick process encourages trying new things and learning from mistakes. It makes abstract ideas real and tangible.
In the end, 3D printing and laser cutting are very empowering. They let creators focus on new ideas, not on making things. The result is a product that looks and feels like it was made by professionals, combining strength with beauty.
User Testing and Ergonomics
Design thinking hits its peak when prototypes are tested in real life. A device might look and work great, but it’s only truly successful if it’s easy and natural to use. This “Test” phase is where we see if our ideas really work.
User testing is more than just getting feedback. It’s about watching people use your prototype to learn how it works and feels.
- Recruit Diverse Users: Choose testers who match your target audience, but also include beginners to find hidden issues.
- Define Clear Tasks: Have users do specific things, like starting the engine, without telling them how.
- Observe and Listen: Notice where they struggle. Listen to their thoughts. Their problems are your best clues.
- Gather Structured Feedback: Use surveys or interviews after testing to understand their feelings about safety, comfort, and looks.
This feedback is key to ergonomics, designing for the human body and mind. It’s where art and engineering meet. For example, a student might create a beautiful support for a steam-powered shoe. But, testing shows it makes the wearer unstable. This forces a redesign, balancing form and function.
Choosing the right testing method depends on your goal. The table below compares common approaches.
| Method | Best For | Key Insight Gained | Resource Level |
|---|---|---|---|
| Usability Testing | Identifying functional flaws and workflow hiccups. | How easily can a user complete core tasks without guidance? | Medium (requires a working prototype) |
| A/B Testing | Comparing two design variations (e.g., two handle shapes). | Quantifiable preference data on form and feel. | Low to Medium |
| Heuristic Evaluation | Early-stage critique against established usability principles. | Expert identification of possible ergonomic issues before user tests. | Low (expert-led) |
This cycle of testing, feedback, and improvement is at the heart of design thinking. It turns a good prototype into a great product. The ongoing refinement, based on real user feedback, makes sure your steam-powered creation is not just impressive but also practical and comfortable.
Gallery Walk and Artist Statements
The final step in any STEAM project isn’t just building—it’s sharing the story behind the build. A gallery walk or exhibition turns a classroom or hallway into a showcase of student innovation. This display celebrates the finished product and motivates learners.
Knowing their work will be seen by many pushes students to improve their designs. A gallery walk makes abstract concepts real and sparks conversations. Visitors can see steam devices, 3D-printed housings, and ask questions. This process helps students develop public speaking and critical thinking skills.
The physical display is just the beginning. The artist statement or designer narrative connects the object to its creator’s intellect. This written or recorded explanation is key to professional presentation. It makes students reflect on and share their journey.
An effective artist statement goes beyond describing the project. It explains the why and how behind the design choices. This narrative is essential for building strong student portfolios. A portfolio shows problem-solving and creative growth.
A strong statement includes several key parts:
- Inspiration and Concept: What sparked the project?
- Design Thinking Journey: How did the idea evolve?
- Technical Challenges and Solutions: What obstacles were overcome?
- Aesthetic Intentions: How did design choices support the device?
- Reflection and Learning: What was learned about engineering or teamwork?
This practice mirrors professional workflows. Engineers and designers must justify their decisions. By writing an artist statement, students learn to present their work. This skill is valuable for college applications and future student portfolios.
Teachers can guide this process with clear prompts and examples. Some students might use comic strips or videos to explain their projects. These formats make documentation more engaging. The goal is to capture the intellectual process, not just the final outcome.
Integrating a gallery walk into your curriculum celebrates achievement and builds a culture of shared learning. Seeing their work displayed with peers’ fosters pride and community. This experience is a highlight of hands-on STEAM projects that prepare students for future careers.
Ultimately, the gallery walk and artist statement complete the learning cycle. They transform a hands-on build into a documented, communicable achievement. This final presentation phase ensures students leave with a story of their process, a polished piece for their student portfolios, and the confidence to present their ideas to the world.
Rubrics: Function + Form + Documentation
How do you fairly grade a project that must be both a precise technical device and a beautiful piece of functional art? A simple checklist for technical performance falls short. It misses the artistic vision and the story of the build. A holistic STEAM assessment needs a balanced scorecard.
This is where a three-pillar rubric becomes essential. It evaluates Function, Form, and Documentation as interconnected, equally vital components of success. This framework gives educators and team leaders clear, objective criteria. It also guides students on where to focus their creative and technical energies.
The rubric below provides a concrete structure for assessment. It turns abstract goals like “good design” into measurable actions. Each pillar contains specific criteria with clear indicators for exemplary work. This transparency is key for fair grading and meaningful feedback.
| Pillar | Key Criteria | Exemplary Indicators | Points Range |
|---|---|---|---|
| Function | Reliability & Performance | Device operates consistently under load; meets all technical specifications. | 0-35 |
| Safety & Efficiency | All safety protocols are integrated; energy transfer is optimized with minimal waste. | ||
| Form | Aesthetic Cohesion | Color, texture, and form create a unified, visually appealing whole. | 0-35 |
| Ergonomics & Craftsmanship | Device is comfortable to use; finishes are smooth; parts fit together precisely. | ||
| Documentation | Process Evidence | Portfolio includes iterative sketches, CAD models, and photos of key prototyping stages. | 0-30 |
| Final Artist Statement | Statement clearly explains design choices, challenges overcome, and the project’s conceptual meaning. |
Let’s break down why each pillar matters. Function is the non-negotiable foundation. A steam device that doesn’t work reliably fails its primary purpose. This pillar assesses engineering rigor.
Form elevates the project from a mere machine to a designed object. It answers questions about user interaction and visual impact. Is the device pleasant to look at and use? Great form demonstrates care and intentionality.
Documentation is often the most overlooked pillar. It is the narrative backbone of the project. Thorough documentation does two critical things:
- It provides proof of the design thinking process for assessment.
- It creates the raw material for powerful student portfolios.
This rubric directly informs what goes into a portfolio. A high score requires excellence in all three areas. So, a top-tier portfolio will naturally contain:
- Technical data and test results (Function).
- High-quality final photos and user interaction videos (Form).
- Sketches, CAD renders, and a reflective statement (Documentation).
Using this rubric shifts the focus from a single final product to the entire creative journey. It validates artistic freedom within a structured framework. Like a “create your own quiz,” it assesses understanding through creative output and its explanation.
For students, assembling their work against this rubric ensures their student portfolios are complete. They tell a complete story of problem-solving, artistry, and growth. That is the true mark of a successful STEAM project.
Accessibility and Inclusive Design
True innovation in steam-powered design is more than just clever engineering. It’s about making sure everyone can use, understand, and enjoy it. This section focuses on universal design. It’s about making projects accessible to people with different abilities and backgrounds.
When building a steam-powered project, think about how everyone will use it. An easy-to-read control panel helps those with vision problems. Handles and levers are designed for all physical strengths. Visual signs show the machine’s status, helping those who can’t hear well.
Being inclusive also means making projects affordable. Financial and material barriers should never block participation. Using cheap, easy-to-find materials helps make projects accessible to all.
Cardboard is a great example. It’s cheap, easy to work with, and safe for beginners. Young students can start with it, and more advanced teams can create complex designs.
This approach lets everyone contribute, no matter their budget or experience. It’s about solving problems creatively, not just buying parts.
By following these principles, you help a wide range of makers. Your steam-powered projects will impress and be socially responsible. They show your team’s dedication to innovation that includes everyone.
Standards and Portfolio Tips
Your steam-powered design work is part of broader educational goals. Standards such as the Next Generation Science Standards (NGSS) and the ISTE Standards for Students recognize the value of connecting art, engineering, and systems thinking. These frameworks encourage creativity while developing practical problem-solving skills used in real-world innovation.
Creating a professional or academic portfolio is an excellent way to showcase your abilities. A strong portfolio does more than display finished projects — it tells the story of your design journey, from the initial concept to testing, refinement, and final production. This process mirrors professional engineering workflows, including those used in advanced industrial projects and heavy machinery solutions, where documentation and iterative design are essential.
For each project, write a story. Explain the challenge, your choices, and the impact. This makes your portfolio a strong case for your abilities. Learn more about portfolio evidence here.
It’s important to explain how your design choices solved problems. This shows the learning you’ve done in STEAM. A portfolio that links beauty to standards is a powerful tool for your future.
