
Imagine turning flowing water into electricity. This idea powers big hydropower plants and can excite learning in your classroom.
Paul Junkin’s hose-powered generator shows it’s possible. It uses simple materials to teach engineering and renewable energy.
This project is more than a steam turbine experiment. It makes energy conversion and mechanical design real. Students see theory turn into something they can touch.
We’re starting a classroom engineering project. You’ll learn to build a mini steam turbine. This project shows how water pressure becomes electrical watts.
Learning Objectives
Students will learn how heat turns into electricity through this activity. It sets clear goals that help build STEM skills. They will see how classroom lessons apply to real-world engineering in renewable energy.
The main goals cover three areas: scientific principles, technical processes, and design thinking. Each goal is tested through building, testing, and analyzing data.
- Explain Thermodynamics: Describe how heat from steam creates pressure and motion. Students will learn the basics of thermodynamics for students. They will see how temperature changes lead to mechanical force.
- Trace Energy Conversion: Show the full journey of energy conversion from heat to mechanical to electrical power. Students will find out where energy is lost.
- Apply the Engineering Design Cycle: See how engineers design, test, and improve technologies. Learners will keep improving their turbine blade designs.
- Contextualize Renewable Technology: Talk about hydropower as a renewable energy source. Discuss how it evolved from simple waterwheels to modern turbines.
- Develop Measurement Skills: Use simple counting to measure the rate of revolution (RPM). This introduces basic data collection methods in mechanical engineering.
These goals help build skills needed in mechanical engineering and sustainable power. By understanding energy conversion, students get a practical view of power plants.
The project makes thermodynamics for students real. It turns learners into active problem-solvers. They will be able to evaluate designs and suggest improvements, just like engineers.
Safety and Heat/Pressure Briefing
Before starting any project, a safety briefing is essential. It makes sure the project is both exciting and safe. We focus on safety to build confidence, not to scare.
Every steam turbine experiment has three main dangers: heat, pressure, and moving parts. Knowing and respecting these is key to safe engineering. Let’s look at the important steps.
Heat sources like burners or hot plates need careful attention. Always think surfaces are hot, even after use. Use mats and keep flammable stuff away.
Make a clear “hot zone” around the boiler. Only the person operating it should be there. Tell student builders to wait until metal parts cool before touching them. Keep cold water nearby for small accidents.
Low-Pressure Steam Guidelines
Our project uses low-pressure steam, but caution is needed. Check all seals and connections before heating. Point any open tubing away from people.
If you hear whistling or see steam where it shouldn’t be, turn off the heat right away. Don’t try to fix connections while they’re hot. Wait for them to cool down.
Rotating Components and Moving Parts
The turbine blades and shaft will spin fast. Keep hair, loose clothes, and fingers away from the rotor. Never reach over a spinning turbine.
Before starting the steam turbine experiment, make sure the blades are balanced and attached well. A loose blade can be dangerous. Watch closely during the start and stop.
Personal Protective Equipment (PPE) Checklist
Wearing the right PPE is very important. It keeps student builders safe from dangers. Everyone should wear:
- Safety Glasses: Protect eyes from steam, debris, and splashes.
- Heat-Resistant Gloves: For handling warm parts or adjusting near heat.
- Closed-Toe Shoes: Keep feet safe from dropped tools or hot water.
- Tied-Back Hair and Fitted Clothing: Avoid getting caught in moving parts.
Setting Up a Safe Workspace
A clean, organized space helps prevent accidents. Use a sturdy table with enough room. Keep tools and hot items in their places.
Have a first-aid kit and a fire extinguisher ready. Post emergency numbers and the eyewash station location.
Classroom Supervision and Culture
Being attentive is the best safety tool. The teacher should show each step first. Make sure only one person works on a task at a time.
Encourage student builders to speak up about safety. Teach them to check each other’s work. This teamwork is key for engineers.
By following these steps, your steam turbine experiment will be both educational and safe. Safety lets student builders learn by doing, turning theory into practice.
Materials and Cost List (Class Set + Alternatives)
Starting a steam turbine project is easier with a list of affordable parts. You might already have some of these items. This guide helps you get everything needed for 24 to 32 students, working in groups of three or four. We focus on budget-friendly and easy-to-find items.
Expect to spend under $100 for a full class set, not counting tools you probably have. Below is a table showing the main materials each group needs to build a working turbine and generator.
| Item | Quantity (Per Group) | Estimated Cost | Purpose / Notes |
|---|---|---|---|
| Small DC Motor (for generator) | 1 | $2 – $5 | Converts rotational energy into electrical output. |
| Clear Plastic Tubing (1/4″ ID) | 1 ft | $0.50 | Directs steam jet onto turbine blades. |
| Aluminum or Plastic Sheet | 1 small sheet | $1 – $2 | For cutting turbine blades. |
| Wooden Dowel (1/4″ diameter) | 1 | $0.25 | Serves as the rotor shaft. |
| Assorted Mounting Hardware | 1 set | $1 | Nuts, bolts, and brackets for assembly. |
| Alligator Clip Test Leads | 2 pairs | $2 | For connecting the motor/generator to an LED. |
| Standard LED | 1 | $0.10 | Visual load to demonstrate power generation. |
The cost per group is usually between $7 and $12. This makes the classroom engineering project easy to scale up. Buying in bulk from electronics or hobby stores can lower the cost even more.
Smart, Cost-Effective Alternatives
For a more affordable project, consider these recycled or low-cost options. They help student builders get creative with finding materials.
- Housing/Base: Use a repurposed plastic soda bottle or sturdy cardboard box instead of a custom-built frame.
- Turbine Blades: Cut blades from old plastic index cards, milk jugs, or aluminum cans instead of buying new sheets.
- Shaft/Bearings: A straightened paperclip or bamboo skewer can substitute for a dowel. Straws make simple low-friction bearings.
- Waterproofing: Use hot glue or waterproof tape instead of specialized sealants.
- Generator: Salvage small motors from broken toys, computer fans, or old DVD players.
Using these alternatives often costs nothing. It adds a valuable layer of resourcefulness to the classroom engineering project. Encourage students to bring suitable items from home.
With this list, educators can plan confidently. The project remains robust and educational while respecting tight budgets. This practical approach ensures every student builder gets a hands-on experience.
How Steam Turbines Work (energy conversion, torque, efficiency)
A steam turbine is a top example of energy conversion. It changes heat energy into motion that powers our lives. This is a great way to learn about thermodynamics for students.
Imagine a high-speed waterwheel, but instead of water, it uses steam. The basic idea is simple. Heat turns water into high-pressure steam.
This steam has a lot of energy. When it goes through a narrow nozzle, its speed increases a lot. This is because of the nozzle’s shape.
The nozzle makes the steam very fast. This fast steam is what makes the turbine work.
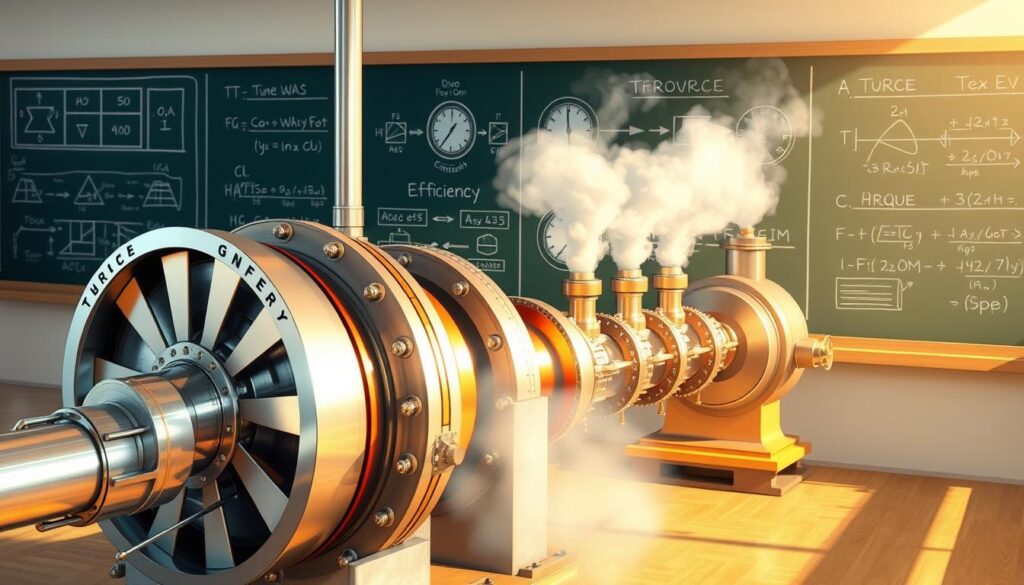
The steam then hits the turbine’s blades. This makes the blades turn. The blades are shaped to catch the steam smoothly.
This turning is called torque. Torque is the force that makes the shaft spin.
So, we’ve changed thermal energy into motion. This motion is what makes the turbine work.
In a power plant, this motion powers a generator. In a model, it might run a motor or light up an LED. The design of the blades is key to capturing energy.
Long, curved blades help the steam transfer its energy well. Bad design means lost energy.
No system is perfect. Real turbines lose energy to friction and heat. This is why efficiency is so important.
| Efficiency Factor | How It Helps | Common Challenge in Models |
|---|---|---|
| Nozzle Design | A smooth, convergent nozzle maximizes steam velocity and kinetic energy transfer. | DIY nozzles can be rough, causing turbulent, inefficient steam flow. |
| Blade Geometry | Curved blades catch steam smoothly, converting more momentum into torque. | Simple, flat blades made from cans lose energy as steam bounces off. |
| Sealing & Clearance | Tight seals between blades and housing prevent steam from escaping without doing work. | Loose fittings in a model allow steam to leak, wasting pressure. |
| Bearing Friction | Low-friction bearings allow the shaft to spin freely, converting more torque to rotation. | Axles rubbing on support frames create drag, soaking up rotational energy. |
Learning about steam turbines teaches us about physics and engineering. The big turbines in power plants use the same ideas but on a huge scale.
Building a small model helps make these big ideas clear. It shows how thermodynamics for students works in real life.
Step-by-Step Build Instructions
This guide will help student builders build a working mini steam turbine. Follow each step carefully for a smooth and safe model. Precision and patience are key to turning parts into a working system.
Start by clearing a flat area and organizing your parts. Check your materials list to make sure you have everything. This helps avoid mistakes and makes the assembly more efficient.
-
Prepare and Mark the Turbine Housing
Your turbine housing is a plastic bottle or can. Cut it to make an open cylinder. Make sure it’s the right size for your blades.
Mark where the axle will go with a ruler and marker. These marks must be opposite each other for balanced rotation. An unbalanced axle causes friction and stops the turbine.
Pro Tip: Use duct tape on the outside of these marks. It helps prevent the housing from cracking when you pierce it.
-
Construct and Attach the Blades
Blade construction is key for capturing steam energy. Cut identical rectangles from aluminum or plastic. Uniform size and shape ensure even force.
Bend each blade at a 45-degree angle. This angle, or pitch, affects how well the steam pushes the turbine. Attach the blades to a central hub using strong glue or epoxy.
- Space the blades evenly around the hub. Uneven spacing causes vibration and imbalance.
- Allow the adhesive to cure completely before handling. A loose blade will ruin your steam turbine experiment.
This image shows the proper blade attachment and spacing. Your assembly should look similar, with blades securely mounted and angled in the same direction.
-
Insert the Axle and Hub
The axle, a sturdy skewer or dowel, transfers rotational force. Carefully pierce the housing at your pre-marked points. Push the axle through one side, then slide your blade-hub assembly onto the center of the axle inside the housing.
Secure the hub to the axle. You can use a dab of glue or a friction-fit washer. The hub must spin with the axle, not slip. Then, push the axle out through the opposite hole in the housing.
Check that the axle extends equally on both sides of the housing. This balance is key for smooth operation.
-
Assemble and Test for Free Rotation
Complete the assembly by securing the axle in place. Use beads or small grommets as bearings where the axle meets the housing. A drop of oil can reduce friction here.
Now, perform the free rotation test. Gently spin the blade assembly with your finger. It should rotate freely for several seconds before slowing down. Listen for scraping sounds and look for wobbling.
- If it doesn’t spin: Check for blade contact with the housing or an axle that is bent or too tight.
- If it wobbles: The hub may be off-center, or the blades might be uneven. Re-check your blade spacing and attachment.
Congratulations! Your mini steam turbine is now assembled. This hands-on phase teaches engineering skills like measurement, symmetry, and iterative testing. Understanding these basic assembly principles connects directly to basic steam engine principles, where precise construction also dictates performance.
With a turbine that spins freely, your student builders are ready for the next exciting phase: connecting it to a generator to produce real electricity. This successful build sets the stage for a rewarding and educational steam turbine experiment.
Wiring a Small Generator/LED Load
When your miniature steam turbine lights up an LED, it’s a real moment. It shows how energy conversion works in action. From heat to motion to electricity, it’s all real for your students.
Wiring is simple, but you must pay attention to details. This ensures success and safety.
You’ll connect a small DC motor to your turbine’s shaft. The turbine’s spin makes the motor’s rotor turn. This creates a small electrical current, turning the motor into a generator.
The key parts are the motor, wires, an LED with a resistor, and a USB module if you want.
- Identify Motor Terminals: Your DC motor has two metal tabs or wires. These are the positive and negative terminals. It doesn’t matter which is which for initial testing.
- Prepare the Wires: Use insulated jumper wires with alligator clips. This allows for easy connections and adjustments during testing.
- Connect the LED: LEDs have polarity. The longer leg is positive (anode). Connect one motor terminal to the LED’s positive leg. Connect the other motor terminal to the negative leg (cathode).
- Add a Resistor: Always include a current-limiting resistor (e.g., 220 ohms) in series with the LED. This protects the LED from burning out due to sudden voltage spikes from the generator.
- Secure the Connection: Attach the motor firmly to your turbine’s base, ensuring the shaft coupling is secure. The turbine must spin the motor shaft smoothly without wobbling.
For a more advanced output, wire the generator to a small USB charging port. These modules stabilize the voltage to 5V. This lets you power a small LED light strip or even charge a low-power device like a fitness tracker. Connect the generator’s wires to the input terminals on the USB module, again observing polarity if marked.
Low-Voltage Circuit Safety
While the voltages generated are very low (typically 1-5 volts) and not dangerous, proper electrical practices are essential. Use only insulated tools and wires. Ensure all connections are tight to prevent sparking. Do not short-circuit the generator terminals by touching them together without a load, as this can overheat the motor. Supervise students closely during this phase.
The table below compares the two primary load options for your turbine generator, helping you choose the best fit for your classroom goals.
| Load Type | Typical Voltage Required | Setup Complexity | Visual Feedback | Best For |
|---|---|---|---|---|
| LED with Resistor | 1.8V – 3.3V | Low | Instant; light illuminates | Demonstrating basic energy conversion clearly and quickly. |
| USB Charging Module | 5V (regulated) | Medium | LED indicator on module | Showing practical application and power storage concepts. |
| Small Buzzer or Fan | 3V – 6V | Low | Audible sound or motion | Engaging multiple senses and demonstrating different electrical loads. |
When you first spin the turbine, the LED might flicker. A steady, bright light requires consistent rotational speed. This shows how energy conversion works. Troubleshooting a dim light leads to valuable discussions about efficiency, friction, and optimal blade design.
Completing this wiring stage turns your build into a real micro-power station. Seeing a glowing LED, powered by steam, validates the whole classroom engineering project. It gives every student a deep sense of accomplishment.
Test Procedure and Data Collection
A systematic test procedure turns your miniature steam turbine into a dynamic data-generating machine. This phase makes abstract energy conversion principles real and measurable. For students, hands-on data collection is key to the scientific method.
Before starting, do a final safety check. Make sure all electrical connections are secure and the turbine is stable on a level, heat-resistant surface. Have a stopwatch or timer, a multimeter, and your data log sheet ready.
Follow this step-by-step protocol for consistent and repeatable results:
- Prime the System: Fill the boiler or heat source with the specified amount of water and begin heating it to generate steam.
- Establish Baseline: With the turbine at rest, note the multimeter reading for voltage and current. This should be zero.
- Initiate Steam Flow: Carefully direct the steam jet onto the turbine blades. Observe the rotor begin to spin.
- Measure Rotational Speed (RPM): Once at a steady speed, count the number of complete rotations in a 15-second interval. Multiply by four to calculate Rotations Per Minute (RPM).
- Record Electrical Output: Using the multimeter, measure and record the voltage (in volts) and current (in milliamps) produced by the connected generator.
- Perform a Work Task: Attach a string to the turbine shaft and connect it to a small weight (e.g., 10-50 grams). Time how long it takes for the turbine to lift the weight a fixed distance (e.g., 0.5 meters).
- Repeat Trials: Allow the system to cool slightly, then repeat steps 3-6 for at least two more trials. Averaging multiple trials increases data reliability.
Accurate recording is key. Use the table below to log all measurements for each trial. This organized approach turns a simple activity into a genuine steam turbine experiment.
| Trial Number | RPM | Voltage (V) | Current (mA) | Time to Lift Weight (s) | Notes (Steam Pressure, Observations) |
|---|---|---|---|---|---|
| 1 | 120 | 0.85 | 15 | 8.2 | Steam flow was strong and consistent. |
| 2 | 115 | 0.82 | 14 | 8.5 | Slight condensation on blades noted. |
| 3 | 118 | 0.84 | 14.5 | 8.3 | Results are very close to Trial 1. |
This table provides a clear framework for thermodynamics for students to analyze. The RPM indicates the mechanical energy of the shaft. Voltage and current reveal the electrical energy conversion. The time to lift a weight directly shows the work output.
To achieve reliable data, control variables. Use the same amount of water, the same heat setting, and the same weight for each trial. Even the angle of the steam nozzle should remain unchanged. This discipline in procedure is what separates casual tinkering from rigorous scientific inquiry.
The act of collecting this quantitative data makes the energy transfer chain visible. Students can see how thermal energy in steam becomes kinetic energy in spinning blades, which is then transformed into electrical energy or mechanical work. This concrete experience is fundamental for understanding thermodynamics for students, moving theory from the textbook into their hands.
Encourage teams to discuss discrepancies between trials. Why might RPM drop slightly? Could friction or electrical resistance be factors? This analysis sets the stage for the next section, where students will use this very data to calculate power and efficiency.
Calculations: Power, Efficiency, Sources of Loss
Knowing where energy is lost is as key as measuring what’s made. This part turns your model into a data-rich experiment. You’ll learn to figure out power output and system efficiency. These steps are how real engineers check energy conversion systems.
First, find the mechanical power your turbine makes. Mechanical power is how fast you do work. You figure it out using how it moves.
Mechanical Power (Watts) = Torque (Newton-meters) x Rotational Speed (radians per second).
If you got a torque of 0.1 N·m and a speed of 220 rad/s, your mechanical power is 22 Watts. This shows how thermodynamics for students works in real life.
Then, find the electrical power from your generator or LED load. This shows the useful output.
Electrical Power (Watts) = Voltage (Volts) x Current (Amperes).
If your generator makes 5 volts at 0.5 amps, the electrical power is 2.5 Watts. This shows the losses in the generator.
Now, let’s talk about efficiency. In a perfect world, all steam energy turns into electricity. But, in reality, it’s different. Say the steam’s energy could make 50 Watts (the best case). But, you only get 22 Watts.
Efficiency (%) = (Useful Output Energy / Input Energy) x 100.
With our numbers: (22W / 50W) x 100 = 44% efficiency. Over half the energy is lost! Finding these losses is a key engineering task.
Big sources of loss include:
- Friction: Bearings and shafts turn kinetic energy into heat.
- Aerodynamic Drag: Air resistance against the turbine blades takes away rotational energy.
- Heat Dissipation: Steam loses thermal energy to air and materials before it can push the blades.
- Electrical Resistance: Wires and connections in your circuit make waste heat.
Each loss cuts down the energy conversion effectiveness. For example, friction might drop 10 watts. Aerodynamic drag could take 8 watts. Knowing these helps find ways to improve.
This analysis is key to thermodynamics for students. It shows no system is 100% efficient. The goal is to make more by lessening known losses. Encourage students to suggest design changes based on their findings. This deepens the lesson in real-world physics and engineering.
Troubleshooting and Iterations
The real test of any classroom engineering project is not avoiding problems but solving them well. For student builders, facing issues like a wobbly rotor or a dim LED is not a failure. It’s the heart of the engineering design process. This phase turns a simple build into a deep learning journey.
Effective troubleshooting needs a systematic approach. First, find the problem. Is the turbine not spinning fast enough, or is it spinning but not generating electricity? Use the table below as a guide for common challenges in this classroom engineering project.
| Problem | Likely Cause | Solution |
|---|---|---|
| Low Rotation Speed | Steam nozzle misaligned with blades; insufficient steam pressure; blade friction on housing. | Realign nozzle to hit blade center. Check kettle seal and hose for leaks. Gently bend blades for more clearance. |
| Poor Electrical Output (Low Voltage) | Generator magnets too far from coil; turbine RPM too low; poor solder connections. | Adjust generator position to minimize air gap. First, solve rotation speed issues. Re-solder all wire joints. |
| Mechanical Vibration or Wobble | Unbalanced blade assembly; bent shaft or axle; loose mounting. | Rebalance blades by adding small weight (clay) opposite heavy side. Replace bent axle. Tighten all frame connections. |
| Steam Leak at Connections | Loose hose clamps; degraded or pinched tubing. | Tighten clamps securely. Replace any cracked or kinked sections of silicone tubing. |
| Blades Not Turning at All | Complete mechanical lock; severe misalignment; condensed water blocking nozzle. | Ensure shaft spins freely by hand. Check for objects jamming blades. Clear nozzle with a thin wire. |
Solving one problem often reveals another. This is where iteration starts. Think like Paul Junkin, who refined his hose-powered generator through repeated tests. He didn’t get the perfect blade design on the first try. He observed, modified, and tested again. Your students should adopt the same mindset.
The iterative cycle has clear steps:
- Diagnose: Use the table and measurements (RPM, voltage) to identify the root cause.
- Hypothesize: Propose a specific change. “If I curve the blades more, they will capture more steam energy.”
- Redesign & Build: Make that single, controlled modification to your turbine.
- Test: Run the turbine under the same conditions as before.
- Analyze: Compare new data with old. Did the change improve performance?
This process turns frustration into focused inquiry. Each iteration, whether successful or not, provides valuable data. It teaches student builders that refinement is a normal and valuable part of any classroom engineering project. The goal shifts from a “working” turbine to an optimized one, fostering a genuine growth mindset where every challenge is a step toward deeper understanding.
Art and Design Extensions (Blade Shapes, Housings)
The final phase of our project invites student builders to move beyond pure mechanics and into the realm of creative design. Your functional steam turbine experiment is now a blank canvas. This is where engineering meets artistry.
Great design balances form and function. It asks not just “does it work?” but also “how does it look and feel?” Let’s explore how your choices in blade shape and housing design can influence both performance and appeal.
Blade design is your first creative variable. Will you use flat paddles or elegantly curved scoops? Curved blades often capture the steam’s energy more smoothly, potentially increasing torque. Flat blades might be simpler to construct and can also be effective.
Next, consider the number of blades. More blades can provide a steadier rotation. Fewer blades might allow for higher speeds. There is no single right answer, which makes it perfect for a classroom test.
The housing or frame offers another huge opportunity. This is your chance for waterproofing, decoration, and storytelling. Could your turbine look like a futuristic power core or a vintage industrial machine? The housing protects the works but also defines the turbine’s character.
This ties directly to industrial design, a field where engineers and artists collaborate. For student builders, it’s a powerful lesson: aesthetic appeal can be a legitimate engineering requirement.
To guide your creative process, consider how different design choices might play out. The table below maps key variables.
| Design Variable | Functional Consideration | Aesthetic Appeal |
|---|---|---|
| Blade Shape (Curved) | May improve energy capture and smooth rotation; often more efficient. | Offers sleek, aerodynamic lines; looks more “high-tech.” |
| Blade Shape (Flat) | Easier to fabricate; can create a more pronounced pulsing effect. | Presents a classic, industrial look; easier to paint or decorate. |
| Number of Blades (Many) | Typically provides more consistent torque and a slower spin. | Creates a dense, intricately detailed wheel; can appear more powerful. |
| Number of Blades (Few) | Often allows for higher rotational speeds with less drag. | Looks minimalist and modern; highlights individual blade form. |
| Housing Material (Acrylic) | Clear, allowing a view of internal workings; moderately waterproof. | Enables a “see-through” tech aesthetic; can be lit with LEDs. |
Look to the real world for inspiration. Modern wind turbines are not just efficient; their sweeping white forms are designed to be visually acceptable in landscapes. Historical waterwheels were often beautifully crafted from local wood and stone.
So, here is your design challenge: Can you iterate on your prototype to create a turbine that is both efficient and beautiful? Test different blade sets. Build a new housing. This process of creative iteration is where true innovation begins for student builders.
Cross-Curricular Links and NGSS/CTE Standards
Building a mini steam turbine is more than just a project. It meets strict educational standards and encourages learning across subjects. This classroom engineering project is a key part of STEM education. It helps students see how science applies in many areas.
This project teaches thermodynamics for students in a real way. It connects abstract ideas to hands-on work. Teachers can use this activity to meet many learning goals.
Alignment with Next Generation Science Standards (NGSS)
This project meets several NGSS standards, mainly in engineering and energy. The table below shows how it aligns.
| NGSS Code | Performance Expectation | How the Project Addresses It |
|---|---|---|
| 3-5-ETS1-3 | Plan and carry out fair tests in which variables are controlled. | Students test turbine blade designs and generator wiring, controlling variables like steam pressure and load to collect comparative data. |
| 4-PS3-4 | Apply scientific ideas to design a device that converts energy from one form to another. | The core activity involves designing a system that converts thermal energy from steam into mechanical rotation, then into electrical energy. |
| MS-ETS1-4 | Develop a model to generate data for iterative testing and modification. | The build-test-iterate cycle allows students to model the engineering process, using data to refine their turbine for better performance. |
This activity also supports foundational skills in CTE pathways, like engineering and green technology. Key benchmarks include:
- Applying engineering design processes to solve a problem with constraints.
- Understanding energy and power systems, a core concept in many technical fields.
- Using tools and materials safely to fabricate a functional prototype.
- Analyzing system efficiency and identifying sources of loss, a critical skill in industrial maintenance and sustainable design.
Creating Cross-Curricular Connections
The classroom engineering project is powerful because it connects subjects. It goes beyond science to other areas.
Social Studies & History: It’s a great way to learn about the Industrial Revolution. Students can explore how the steam engine changed society and work. This links their model to big historical themes.
Mathematics: Calculating efficiency and power output makes math real. Students use math to measure their turbine’s performance. This turns formulas into meaningful results from their work.
Environmental Science: Talking about the environmental impact of energy sources is natural. Comparing the steam turbine to other energy sources sparks a conversation about green energy. It shows the trade-offs in power generation.
By linking to these subjects, the project supports broader learning targets for student growth. It shows how technical skills relate to history, math, and civic duty.
This approach makes learning thermodynamics for students more fun and lasting. It shows engineering is not alone. This focus prepares students for today’s complex world.
Differentiation and Accessibility
Differentiation isn’t about making separate projects. It’s about creating flexible paths in one project to fit different learners. Every student has unique strengths in a classroom engineering project. We aim to make sure all can participate, learn, and succeed.
An inclusive project starts with careful planning. Teachers should think about how to change materials, make procedures simpler or longer, and adjust tests. This way, one activity becomes a learning experience for everyone. It lets every student understand energy conversion.
Setting up tiered challenge levels is a great strategy. This lets student builders work at their own pace or challenge themselves. Below is a table showing different levels for building, testing, and analyzing.
| Focus Area | Entry Level | Standard Level | Advanced Level |
|---|---|---|---|
| Build & Assembly | Pre-cut materials, pre-drilled holes, visual step-by-step cards. | Following written instructions with standard materials. | Designing custom blade shapes or optimizing housing aerodynamics. |
| Testing & Data | Qualitative observation (LED brightness, spin speed). | Measuring voltage/time with provided tools. | Designing a new test variable (e.g., water temperature, nozzle angle). |
| Analysis & Calculations | Verbal explanation of energy transfer steps. | Calculating power output using a provided formula. | Calculating system efficiency and proposing loss reduction strategies. |
Changing materials is key for accessibility. For those with fine motor skill differences, use bigger cans, pre-attached wires, or adaptive scissors. Use glue instead of soldering and wider brushes for painting. The turbine’s function stays the same, but it’s easier to complete.
Assigning roles in a team is also important for an inclusive classroom engineering project. It lets students use their strengths and learn from others. This way, no one student does all the work.
- Project Manager: Oversees timeline, ensures team communication.
- Head Builder: Leads physical assembly following instructions.
- Data Recorder: Responsible for measurement, logging, and charting results.
- Safety Officer: Monitors heat source, tool use, and clean-up procedures.
- Quality Tester Operates the turbine, observes performance, reports issues.
By giving choices in challenge, materials, and roles, you create a flexible learning space. This way, everyone can enjoy the thrill of turning water into watts in your classroom.
Assessment Rubric and Reflection Prompts
To measure the impact of the mini steam turbine build, educators need tools. These tools should evaluate both the product and the process. A good assessment strategy ensures that the hands-on activity leads to lasting understanding and skills for all student builders.
We don’t just check if the turbine spins. We aim to assess the engineering design process, teamwork, scientific thinking, and ability to improve. This approach mirrors how real engineers are reviewed.
The following rubric helps grade this classroom engineering project. It looks at both how well the turbine works and how the team approached it.
| Assessment Criteria | Exemplary (4 pts) | Proficient (3 pts) | Developing (2 pts) | Beginning (1 pt) |
|---|---|---|---|---|
| Conceptual Understanding | Accurately explains energy conversions, torque, and efficiency losses in their own words. | Describes basic energy conversion and identifies major sources of efficiency loss. | Recites definitions but shows limited application to their specific turbine design. | Struggles to explain core concepts related to the project. |
| Iterative Testing & Data Collection | Systematically tests multiple variables, documents all data clearly, and uses results to inform redesign. | Completes required tests, records data, and makes one logical design change based on findings. | Completes tests with inconsistent data recording; design changes are not data-driven. | Fails to complete testing procedure or record usable data. |
| Documentation & Teamwork | Team maintains clear build logs, delegates tasks effectively, and resolves conflicts constructively. | Team shares workload and maintains basic notes on process and challenges. | Documentation is sparse; teamwork is uneven with one member dominating or disengaging. | Little to no documentation; team collaboration is ineffective. |
| Final Product & Performance | Turbine operates reliably, generates measurable power, and demonstrates thoughtful construction. | Turbine operates and generates power, but with minor inconsistencies or cosmetic flaws. | Turbine operates intermittently or produces minimal/no power output. | Turbine does not function as intended. |
This rubric makes learning objectives clear. It rewards the journey of problem-solving as much as the end result of a working device.
Reflection prompts deepen learning by encouraging students to think about their experience. They help student builders analyze their journey and plan for future improvements.
- What was the biggest surprise in your test data, and what does that suggest about your turbine’s design?
- If you had unlimited time and resources, what three changes would you make to your turbine? Rank them by expected impact on efficiency.
- Describe one moment where your team faced a disagreement or challenge. How did you resolve it, and what would you do differently next time?
- How does the energy loss in your model turbine compare to the challenges faced by real-world power plants? What scale is the biggest factor?
- What skill from this project (e.g., soldering, data analysis, prototyping) do you feel most confident about now? Which one needs more practice?
These prompts turn a fun build into a reflective learning experience. They prepare students for professional critique and self-directed improvement, showing the value of the classroom engineering project.
Showcase Ideas and Community Partnerships
Your mini steam turbine is more than a classroom model. It shows the basics of big energy projects like the Hoover Dam and Brazil’s Itaipú Power Plant. By sharing your work, you connect it to the real world of power generation and community impact.
Think about hosting a classroom “energy fair” where students show off their turbines. Make a short video to share on a school website or social media. Or, enter your project into a local or online science competition. These steps make thermodynamics for students real and celebrated.
Getting involved with the community can make your project even more meaningful. Ask a local mechanical engineer or power plant technician to check out the projects. Plan a trip to a small hydroelectric or geothermal facility. Or, work with a makerspace to learn about making turbine blades.
These connections show how engineering is important in the real world. Your steam turbine project is a small part of global energy innovation. It turns complex thermodynamics into a hands-on lesson with a big impact.
