
Forget the idea of a simple reward day. A visit to an industrial facility can be a serious educational tool, deeply connected to classroom learning. This guide will show you how to transform a standard power plant tour into a rich, curriculum-aligned experience.
Too often, educational outings fall into the “see everything, learn nothing” trap. The key to success lies in moving beyond basic worksheets. It requires planning for deeper engagement from the start.
You must first decide what you want every student to gain from the experience. This purpose-driven approach focuses on clear learning outcomes. It turns passive observation into active discovery.
We introduce the curator model. Here, students become investigators, seeking answers to guiding questions before, during, and after the visit. This framework sets the stage for the detailed planning steps that follow.
Learning Outcomes for the Trip
Planning a field trip starts with knowing what students will learn. Setting clear goals turns a simple trip into a learning adventure. These goals shape every part of the trip, from before to after.
Begin with a key question. This question guides what students will observe and think about. For example, at a power plant, ask, “How does thermal energy become the electricity we use?” or “What are the benefits and drawbacks of using this energy source?”
These questions tie to important science and engineering standards. They make the trip a day of deeper, applied learning, not just a break.
From your main question, create specific learning goals. Good goals are clear and can be seen. They mix knowing the content with doing science or engineering.
Here are some examples based on visiting a hydropower dam:
- Identify and Explain: Students will spot the main parts of a steam turbine and explain how they work.
- Analyze Trade-offs: Students will list two good points and two bad points about a power method seen on-site.
- Apply Engineering Design: Students will talk about how engineers might change a part, like a cooling system, to make it better or less harmful.
- Collect and Interpret Data: Students will count and time to guess how fast a turbine or generator is spinning.
This mix is key. The first two goals focus on content knowledge—knowing about energy changes and the pros and cons of power methods. The last two focus on engineering practices—looking at designs and collecting data. This mix makes learning real.
Clear goals lead to all the trip’s activities. Before the trip, teach the needed words and ideas. Use scavenger hunts and worksheets during the visit to see if students are learning. Afterward, let students show what they’ve learned through projects.
Spending time on trip planning is worth it. It makes the trip a focused, meaningful journey from school to the plant and back.
Pre-Trip Lessons: Safety, Energy Basics, Vocabulary
Before students visit a power plant, they learn important lessons. These lessons are key to a successful field trip planning. They make the tour both fun and educational.
Students come ready, eager, and safe. They know what they’ll see and why it’s important.
Start with basic energy ideas. A hands-on activity, like making a waterwheel, shows how energy works. It makes hard concepts easy to understand.
Then, have a group talk. Use a true/false quiz on important facts. For example, ask if hydropower dams cut pollution. Students vote, then learn the science behind it. This method gets them thinking and learning.
Next, talk about different energy sources. Compare nuclear fission to coal burning. Use simple examples to help students grasp these ideas.
Teaching key words is also vital. Plant engineers use special terms. Learning these words helps students understand better.
| Term | Function | Simple Analogy |
|---|---|---|
| Turbine | Converts fluid energy (steam, water, gas) into rotational mechanical energy. | A very powerful, sophisticated windmill. |
| Boiler | Heats water to create high-pressure steam using heat from combustion or fission. | A giant, industrial-grade kettle. |
| Generator | Converts the turbine’s mechanical rotation into electrical energy. | The part that actually makes the electricity we use. |
| SCADA Controls | Supervisory Control and Data Acquisition; the computer system that monitors and operates the plant. | The plant’s “brain” and nervous system. |
Knowing these terms helps students follow along and ask smart questions. It makes them more involved.
Lastly, safety is a must. Industrial sites can be dangerous. Use examples to show why safety rules are so important.
Discussing events like Chernobyl teaches students about safety. It shows the dangers of ignoring rules.
Make sure students understand today’s safety rules. Explain why they’re important. Tell them these rules keep everyone safe.
These three areas—energy basics, vocabulary, and safety—are the foundation of good field trip planning. They make the trip a memorable learning experience.
Logistics Checklist (Permissions, Chaperones, PPE)
This checklist is your guide for a safe and approved power plant tour. It helps avoid last-minute problems.
Follow this step-by-step guide to make planning easier.
Phase 1: Permissions and Paperwork
Begin two months before your visit. School rules can be different.
- District Approval: Submit a field trip proposal to your school. Include the goals, date, location, and budget.
- Parental Consent: After approval, send out permission slips. They should explain the trip, risks, and a waiver. Set a deadline for return.
- Plant Facility Agreement: Work with the plant’s safety team to sign any needed agreements. Confirm the details like date, time, and number of students.
Phase 2: People: Chaperones and Staff
Having adults with you is key for safety and managing the group. Start recruiting early.
- Recruitment Ratio: Aim for 1:5 or 1:8 chaperone-to-student ratio. Get more adults than needed.
- Chaperone Briefing: Have a meeting before the trip. Discuss behavior, emergencies, the plan, and group roles.
- Role Clarification: Tell chaperones they’re for safety and keeping students engaged, not teaching. Give them questions for students to learn.
- Plant Point of Contact: Choose one teacher to be in charge of the plant guide. Share chaperone and student names for security.
The last phase is about getting ready and confirming details. Safety gear is a must.
Use this table to check if you have all the safety equipment. The plant might give you hard hats and glasses, but ask first.
| PPE Item | Purpose | Notes for Students |
|---|---|---|
| Hard Hat | Protects from overhead hazards | Must be properly fitted and worn at all times in designated areas. |
| Safety Glasses | Shields eyes from dust and debris | Must be worn over prescription glasses. No exceptions. |
| Closed-Toe Shoes | Protects feet from heavy objects | Leather work boots or sturdy sneakers are required. No sandals or flats. |
| High-Visibility Vest | Increases visibility in industrial areas | Often provided on-site. Long hair should be tied back. |
Also, make sure to finalize these important details:
- Transportation: Book buses early. Give drivers the address, loading/unloading info, and a plant contact number.
- Lunch Logistics: Decide if students will bring lunches or eat at the plant. Plan for trash.
- Day-of Communication: Make a contact list for chaperones and plant staff. Use a group text or email for updates. Teach students about the communication plan for the power plant tour.
Following this checklist helps focus on the educational value of the visit. A well-planned tour is a safe and successful learning experience.
On-Site Scavenger Hunt and Interview Questions
When students arrive at the power plant, they start a scavenger hunt. This turns the whole place into a puzzle to solve. They become curators of information, searching for answers to a main question. This hands-on approach supports key educational goals by making learning real and student-led.
Good student worksheets for scavenger hunts give clear tasks. They focus on important parts and processes. This keeps everyone focused and collects valuable data for future lessons.
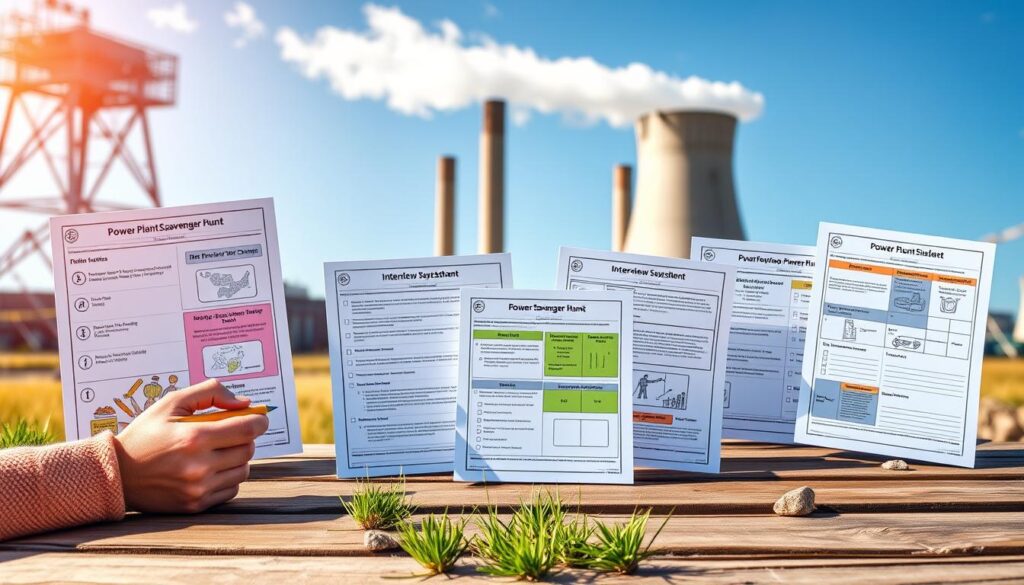
The sample worksheet below gives students a mission. It asks them to find, observe, and record important findings.
| Item to Find | Location Hint | Observation Task | Why It’s Important |
|---|---|---|---|
| Main Control Room | Often a glass-walled room overlooking the plant floor. | Count the number of monitoring screens. Note one key measurement displayed (e.g., MW output). | This is the plant’s “brain,” where operators make real-time decisions to keep the grid stable. |
| Steam Turbine Casing | Connected to the boiler; a large, cylindrical metal assembly. | Sketch its general shape. Listen and describe the sound it makes. | This is where thermal energy from steam is converted into mechanical energy to spin the generator. |
| Cooling Tower Intake | Look for large pipes feeding into the base of the tall, hyperbolic towers. | Estimate the pipe diameter. Feel the air around it—is it warm or cool, moist or dry? | This water is key for condensing steam back into water, finishing the thermodynamic cycle. |
| Condenser | Typically located near the turbine hall, a large heat exchanger. | Identify the two sets of pipes entering it (hot steam and cool water). | It boosts the cycle’s efficiency by creating a low-pressure zone for the turbine exhaust. |
Along with the scavenger hunt, interview questions let students talk to experts. These questions dive deeper than just facts. They explore the human and technological side of the plant.
- “What does a typical challenge in your daily work look like, and how do you solve it?”
- “How has technology, like digital sensors or automation, changed plant operations in the last ten years?”
- “What safety procedure do you think about most often, and why?”
- “What kind of training was most valuable for your career here?”
Technology makes these student worksheets even better. Students should use tablets or smartphones to document their trip. They can take photos, record videos, or tweet findings with a class hashtag. This creates a digital portfolio for later analysis and sharing.
This mix of hands-on exploration, thoughtful questions, and digital documentation leads to deep engagement. Students leave with memories, evidence, data, and personal stories. These make the science of power generation unforgettable.
Observation Worksheets for Turbines/Boilers/Controls
Observation worksheets are inspired by hands-on engineering design. They turn a tour into a focused investigation. Students learn about the plant’s core systems through these worksheets.
Good worksheets help students go from just seeing to really understanding. They give a clear way to collect data. This is how real plant engineers work every day.
Effective worksheets break down big systems into smaller parts. We offer three templates, each with specific questions. These questions help students focus their attention.
- Turbine Observation Sheet: Students draw the blade design and note important data like steam temperature. It shows how the turbine turns energy into motion.
- Boiler Observation Sheet: Students find the main fuel and record efficiency ratings. It makes the idea of heat generation real and measurable.
- Control System Observation Sheet: Students draw a basic control loop from the control room. It explains how operators manage the plant.
These tools can be tailored for your visit. They show that your visit is a serious inquiry, not just a field trip. This approach helps build strong industry partnerships. Sites are more likely to engage with students who ask smart questions.
With these worksheets, students don’t just look at machines. They start to think like the engineers who design and run them. This is the start of real learning and exploring future careers.
Risk Management and Behavior Expectations
Good risk management makes a tour safe, focused, and educational. It covers the plant’s safety and the group’s behavior. A good plan stops accidents and makes learning the main goal.
Start with the plant’s safety team. Get their safety video and rulebook before the visit. Talk about them in class to make rules clear. Role-playing different scenarios is a great way to prepare.
Students can practice what to do in an emergency or if they get lost. This makes them feel more confident and comfortable.
It’s important to have clear rules. Explain them as professional standards, not just rules. Share them with students, chaperones, and parents early on.
- Stay with the assigned group and chaperone at all times.
- No touching of equipment, panels, or controls unless explicitly invited by plant staff.
- Follow instructions from plant personnel immediately and without question.
- Use designated walkways and be aware of trip hazards like cables or curbs.
- Wear provided Personal Protective Equipment (PPE) correctly for the entire tour.
A virtual tour is a great tool for risk assessment. Many places, like Vermont Yankee, have online tours. A virtual tour before the real visit is very helpful.
This digital tour helps students get to know the layout and safety signs. It makes the real visit more focused on learning, not just getting around. It’s like a practice run that makes everyone safer.
Don’t forget about emergency plans. Talk about the plant’s emergency signals and how to leave quickly. Make sure chaperones know the plan, have contact numbers, and know what to do in bad weather or if the plant shuts down.
| Management Phase | Key Actions | Primary Goal |
|---|---|---|
| Pre-Visit | Review plant safety materials; conduct student role-plays; assign a virtual tour. | Familiarization and knowledge-based risk reduction. |
| On-Site | Reinforce behavior expectations; verify PPE; maintain group integrity. | Active supervision and immediate hazard avoidance. |
| Emergency Readiness | Confirm communication plan; identify muster points; brief all chaperones. | Prepared response to unforeseen incidents. |
Good risk management is about safety and respect. When students understand the rules, they help keep themselves safe. This makes learning at a complex site not just possible but very successful.
Accessibility and Alternative Activities
Accessibility is a key part of planning a power plant field trip. It’s about making sure every student can learn. This means thinking about physical, sensory, and learning differences.
It also means creating alternative assignments. This way, no student misses out on important learning.
Planning for Physical and Sensory Accessibility
Start by talking to the plant’s facility manager early. Discuss what students need before the visit. Ask for a map of the tour to spot any barriers.
Many plants can make paths accessible or offer elevator access. This makes the tour easier for everyone.
For students who can’t see well, ask if staff can describe the machinery. For those who can’t hear, make sure chaperones can pass on instructions. Simple steps make a big difference.
Not all students learn the same way. That’s where differentiated instruction comes in. “Activity Scaling” is key. It lets you adjust tasks to fit each student’s level.
For younger or struggling students, do demonstrations as a class. Focus on big ideas like energy changes. For advanced learners, add real-world challenges. Ask them to think about costs or efficiency.
Break down your main question into smaller ones. Write these on a map or handout. This helps students focus without feeling overwhelmed.
| Student Group | Suggested Activity Adaptation | Added Learning Depth |
|---|---|---|
| Lower-Grade / Introductory Students | Class demonstration of a single process (e.g., steam generation). Use simplified student worksheets with picture-based prompts. | Focus on vocabulary and basic sequence. Builds foundational knowledge. |
| Upper-Grade / Advanced Students | Add analysis constraints like cost, environmental impact, or thermal efficiency. Use data from plant schematics. | Develops critical thinking and applied math skills. Connects science to economics. |
| Students Needing Sensory Breaks | Provide a designated quiet zone with pre-recorded tour highlights and diagram-based activities. | Reduces cognitive load while maintaining engagement with core concepts. |
| Students Unable to Travel | Assign a detailed research project using publicly available plant schematics and simulated operational data. | Achieves similar learning outcomes through independent study and analysis. |
Meaningful Alternative Assignments
Not every student can go on a field trip. Illness or mobility issues might stop them. But, you can give them a challenging alternative.
Give them detailed plant schematics and data for a week. Ask them to analyze trends or solve a problem. This is like real engineering work.
These special student worksheets and projects show you care about all students. They help build strong industry partnerships.
Strengthening Your Proposal
When asking for a plant tour, lead with your inclusive plan. Explain how you’ll meet different needs. This makes your proposal stronger.
It turns the tour into a joint educational effort. It shows you value the plant’s time and want to make the most of the visit. This is key to getting and keeping industry partnerships.
Inclusion is smart teaching. It makes sure every student can learn about power generation.
Post-Trip Labs and Reflection Activities
The field trip is just the start. It leads to deeper learning with design challenges and comparisons. Students apply what they saw in class, turning passive viewing into active learning.
Teachers should plan hands-on labs and discussions. These activities help students understand and apply what they learned. They bridge the gap between theory and real-world use.
Hands-On Engineering Labs
Simple projects make complex ideas easy to grasp. A great example is building a model steam turbine with basic materials. Students see how changing blade design or steam pressure affects output.
Another key activity is data analysis. Students use their collected data to calculate the plant’s efficiency or compare fuel costs. This turns them into energy auditors.
- Build a Model Turbine: Use plastic bottles, straws, and pins to demonstrate kinetic energy conversion.
- Calculate Plant Efficiency: Use the heat rate formula with data from the trip’s observation worksheets.
- Design a Waterwheel: As seen in the nuclear energy virtual field trip resources, teams can present designs and brainstorm improvements.
Structured Reflection and Assessment
Guided reflection helps students connect their experience to classroom lessons. It encourages higher-order thinking.
Effective prompts include:
- How did the safety procedures you saw compare to our classroom discussion?
- What was one surprising fact about the energy conversion process?
- If you were the plant manager, what one efficiency improvement would you prioritize?
Assessment should follow learning objectives standards for engineering design. Hold a “Lesson Summary Assessment” through a class discussion. Students share answers and debate different viewpoints.
Comparative Analysis with Virtual Tours
Comparing different plants deepens understanding of the energy landscape. Use a virtual tour of a different facility, like a nuclear or hydroelectric plant. This highlights contrasts in technology, fuel, and environmental impact.
Students can create a comparison table. This makes differences and similarities clear.
| Feature | Coal Power Plant (Visited) | Nuclear Power Plant (Virtual Tour) |
|---|---|---|
| Primary Fuel | Coal | Uranium |
| Carbon Emissions | High | Very Low |
| Base Load Capacity | Yes | Yes |
| Waste Byproduct | Fly Ash, CO2 | Spent Nuclear Fuel |
This analysis fosters systems thinking. Students see that energy solutions involve trade-offs. The virtual tour broadens perspective without leaving the classroom.
Encourage student teams to present their findings. This mirrors real-world engineering reviews. They can propose improved designs for the models they built. They should also discuss what they learned from other teams’ projects.
These post-trip activities ensure the field trip is not a one-day event. It becomes the foundation for a lasting unit on energy, technology, and career possibilities.
Virtual Tour Options if Travel Isn’t Possible
A virtual tour is not just a backup plan. It’s a powerful tool for immersive learning about energy infrastructure from any classroom.
When an in-person power plant tour isn’t feasible, a digital alternative can be equally rigorous. The key lies in deliberate design and using high-quality resources.
Start by curating reputable online platforms. The Nuclear Energy Institute offers extensive digital materials on nuclear operations. Many major utility companies host virtual tours of their specific facilities.
For exterior views and scale, Google Earth provides stunning 360-degree imagery. These resources form the core of your virtual field trip destination.
Structure the experience with the same intent as an on-site visit. Begin with pre-trip lessons on safety and energy basics. Then, guide students through a sequenced online exploration.
A proven model involves visiting four key websites and a short interior plant video. Students use a dedicated handout with focused questions to direct their observation.
This handout, like the one from the Teach Nuclear lesson, prompts analysis of the steam turbine process, nuclear fission, fuel handling, plant structure, and safety systems. It transforms passive watching into active investigation.
Conclude with meaningful post-trip assessments. These can include the same labs and reflection activities used for an in-person trip. This ensures learning objectives are met.
This approach builds foundational knowledge that is often deeper than a rushed physical tour. Students can pause, rewind, and research in real-time.
Such preparation makes future industry partnerships more impactful. When students eventually visit a site, they arrive with informed questions. This demonstrates serious engagement to professional contacts.
A well-executed virtual tour is a strategic educational asset. It expands access and prepares learners for real-world interactions in the energy sector.
Community and Career Connections
Students see real-world operations thanks to a team of STEM professionals. This leads to exploring careers. They learn about the people and paths behind the power.
Every part of a plant, from big turbines to small control systems, is made and fixed by engineers. These experts solve complex problems. This is a foundational career skill in all technical fields.
Teachers can guide students in a research activity. They use student worksheets to find out about engineering roles in the facility.
The table below shows key engineering roles in plant operations. It helps students link what they saw on their trip to specific careers.
| Engineering Discipline | Primary Focus in a Power Plant | Sample Student Research Question |
|---|---|---|
| Mechanical | Design and maintenance of turbines, pumps, boilers, and piping systems. | How does a mechanical engineer ensure a turbine rotor spins efficiently and safely? |
| Electrical | Power generation, distribution, grid connection, and control system electronics. | What steps does an electrical engineer take to protect the grid from a sudden surge? |
| Chemical | Fuel quality, water treatment for steam cycles, and emissions control processes. | How does a chemical engineer minimize harmful byproducts from the fuel combustion process? |
| Environmental | Ensuring compliance with regulations, managing waste, and protecting local ecosystems. | What monitoring systems does an environmental engineer put in place for water discharge? |
| Civil/Structural | Designing the foundation, buildings, and support structures to withstand immense loads and stresses. | What factors does a civil engineer consider when designing a dam or cooling tower? |
A career profile worksheet can guide this research. The activity might include these steps:
- Choose one engineering role from the table above.
- Research the typical educational path and key skills needed.
- Connect the role to a specific piece of equipment or process observed during the trip.
- Prepare three questions you would ask a professional in that field.
To create a direct community link, arrange a post-trip virtual tour. Have a live Q&A session with a plant engineer. This lets students ask their questions and get real answers.
This follow-up virtual engagement makes careers real. It shows students that the professionals they met are reachable. Their classroom learning has real-world uses.
Assessment: Presentations and Thank-You Letters
Effective assessment wraps up the educational trip to a power plant. Start with quick reflection activities. Use “Making Sense” sheets during the bus ride home to capture students’ new insights and observations. This approach helps teachers check understanding before moving into the next lesson.
Group presentations provide a deeper method of evaluation. Student teams can explore a specific system, such as turbine operations or energy distribution processes. They may also discuss energy policy issues they observed during the visit, demonstrating critical thinking while applying vocabulary introduced before the trip. These discussions can also connect classroom learning to real-world engineering practices and heavy machinery solutions used in modern power generation facilities.
Writing thank-you letters to the plant hosts is another valuable activity. It teaches professional courtesy while reinforcing learning outcomes. Students can highlight one inspiring fact they discovered, helping strengthen partnerships with industry professionals and making future educational visits more accessible.
These final steps close the learning loop by measuring progress against the original learning goals. Thoughtful assessment ensures the entire experience — from preparation to reflection — becomes a meaningful and lasting educational journey.
