

Learning is best when it’s shared. It happens in the buzz of ideas, the excitement of a workshop, and the wisdom of mentors.
This isn’t just a motivational speech. It’s about the power of community in learning. Studies on STEAM education show it boosts achievement. Why? It brings wonder, critique, and innovation to the table.
Consider this. STEM alone misses key components. True growth needs a network. Mentorship turns basic skills into mastery. A strong safety culture lets us take risks. And seeing projects in action inspires more than any diagram.
This section is your guide to that world. We’re moving away from teaching for tests. You’re joining a network that prepares you for the real world. We’ll help you find the right live steam clubs for students and supportive model engineering societies.
How to Identify Youth-Friendly Clubs and Museums
Not every museum with a steam engine display is welcoming to young minds. Some feel like high-security art galleries. Your task is to become a cultural detective. You need to tell the difference between a museum and a hands-on learning hub.
Begin by checking out a club’s website. A good website is like an open door. Does it show off dusty relics or invite you to get hands-on?
Here are signs of a youth-friendly model engineering society:
- Structured Junior Programs: Look for specific programs for students. Avoid vague “all are welcome” messages.
- Process Over Product Imagery: Check the photo gallery. Does it show off perfect adult projects or the messy work of kids?
- Keyword Radar: Look for words like “open workshop,” “mentor-led,” and “build sessions.” These show a focus on doing.
In the world of live steam clubs for students, you’ll find two main types: the Archive and the Gym.
The Archive is like a museum. It’s full of finished wonders but doesn’t encourage hands-on learning. The Gym, on the other hand, is a makerspace. It’s where you can learn by doing, making, and creating.
Which one helps you grow and learn more? Clearly, the Gym is better. It’s like the City of Hamilton’s youth engagement strategy. It focuses on active learning and skill-building.
| Feature | Static Display Museum (The Archive) | Dynamic Makerspace (The Gym) |
|---|---|---|
| Primary Focus | Preserving and showing off finished projects. | Helping you build and learn. |
| Atmosphere | Quiet and respectful, “look but don’t touch.” | Busy and collaborative, “what if we try this?” |
| Youth Engagement | Maybe a school tour once a year. | Regular clubs, mentorship, and open lab hours. |
| Language Used | “Collection,” “exhibit,” “history.” | “Prototype,” “iterate,” “collaborate,” “test.” |
| Best For a Student | Initial inspiration and history. | Practical skills, confidence, and community. |
Before taking your students somewhere, check the website. If it’s all about “Do Not Touch” signs, it’s likely an Archive. Keep looking.
The right model engineering society will teach you more than just show you steam engines. You’ll learn to build, troubleshoot, and understand the science behind it. That’s where young engineers grow.
Outreach Templates: Email and Call Scripts
That cold-call dread is real. Your hand hovers over the phone like a poorly greased piston over a cylinder—it’s just not going in smoothly. You’re not asking for a favor. You’re proposing a collaboration. Let’s build the rhetorical armor you need.
We’ll craft two weapons: a formal email for the club secretary and a confident follow-up call script. The goal isn’t just a reply. It’s an open door.
Subject: Inquiry from [Your School/Group Name] Students Re: Possible Visit & Learning Opportunity
Dear [Club Secretary Name or “Club Secretary”],
My name is [Your Name], and I coordinate STEAM initiatives for students at [Your School/Organization]. Our group has long admired the [Club Name]’s craftsmanship and dedication to preserving the art of model engineering. Your recent [mention a specific project, exhibition, or detail from their website if possible] was inspiring.
We are writing to humbly inquire if the club would ever consider hosting a small, respectful group of students for a brief visit or conversation. We understand your time is immensely valuable. Our aim is not to disrupt, but to ignite a spark of curiosity in the next generation—to show them that patience, precision, and passion are alive.
Would there be a possibility to discuss this further, perhaps via a short call at your convenience? We are flexible and deeply grateful for your consideration.
Sincerely,
[Your Name]
[Your Title/Contact Info]
Why it works: It leads with genuine admiration, states a clear and concise “ask,” and frames the students as an investment in the hobby’s future. You’ve swapped a transaction for an invitation to transmit knowledge.
The Confident Follow-Up Call Script
If you get a voicemail: “Hello, this is [Your Name] calling for [Club Contact Name]. I’m following up on an email regarding a possible student learning opportunity. My number is [Your Number]. Thank you for your time and your incredible work. Goodbye.”
If you get a person: “Hello, my name is [Your Name]. I’m calling to briefly follow up on an email I sent about a possible student visit. I know you’re busy, so I can be brief. Would there be a better time to talk, or should I simply follow the process outlined on your website?”
The phone script is a scalpel, not a sledgehammer. It’s concise, presumes competence (theirs and yours), and offers an easy off-ramp. It demonstrates respect.
The core philosophy here is transmission over transaction. You’re not asking for a thing; you’re proposing a partnership in passing the torch. A little strategic flattery, wrapped in crystalline clarity, disarms skepticism. It turns a “cold” call into a warm introduction.
Ready to move from scripts to action? These templates are your first step in building a real-world bridge for your students. For more on creating these transformative connections, explore our mission at Lili & STEAM. Now, go make that call. The workshop awaits.
Planning a Field Trip or Guest Visit (Checklists)
Planning a field trip is like a heist movie. You need to plan carefully, assign roles, and have a clear goal. Without this, it’s just a mobile snack festival. Our field trip planning uses the STEAM process to make it educational.
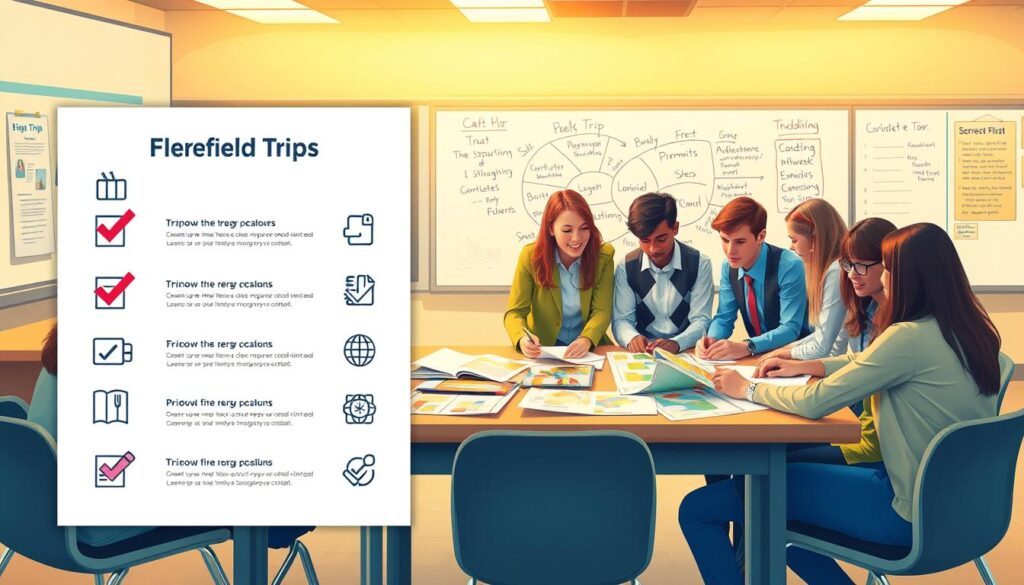
Let’s get organized. Forget about counting chaperones for now. The real learning starts before the trip.
Phase 1: Focus (The “Why”)
This is your mission briefing. What’s the main question driving this trip? “How do local engineers solve water management?” is a good goal. “Look at some old machines” is not. Define your main question. Everything will revolve around it.
- Pre-Trip Checklist – Focus:
- Articulate one essential question for the visit.
- Align the question with a current classroom unit or project.
- Brief students on this “mission objective” one week prior.
Phase 2: Detail (The “What”)
Now, gather the intel. What context do your students need? This phase builds foundational knowledge for them to recognize brilliance on-site.
- Pre-Trip Checklist – Detail:
- Introduce 5-10 key vocabulary terms specific to the venue.
- Assign pre-visit research roles: Historian, Material Analyst, Sustainability Scout.
- Create a simple “I Spy” list of 3-5 specific artifacts or features to find.
Phases 3 & 4: Discovery & Application (The “How” On-Site)
The bus arrives. Now, it’s time to see, not just look. Discovery is the scavenger hunt based on your “Detail” work. Application is the immediate “so what?”
- On-Site Checklist – Discovery & Application:
- Students fulfill research roles, taking notes and photos for their specialty.
- Teams find and document items from the “I Spy” list.
- Pose a real-time problem: “Using the bridge design we just saw, how would you span this hallway?”
- Conduct a 10-minute “field sketch” of one compelling design.
Phase 5: Presentation (The “Debrief”)
The heist isn’t over when you leave. The team must present the findings. Back in the classroom, students turn raw observation into clear insight.
- Post-Trip Checklist – Presentation:
- Role-based groups create a 3-slide or poster summary of their findings.
- Host a gallery walk where teams explain their field sketches and solutions.
- Compare the venue’s solutions to historical or modern alternatives discussed in class.
Phase 6: Link (The “Next Job”)
This is the often skipped step. How does this trip fuel the next project? The trip becomes a reference point, not just a memory.
- Post-Trip Checklist – Link:
- Use a reflection prompt: “One engineering principle from the trip I will use in my own project is…”
- Explicitly connect one observed solution to an upcoming team build or design challenge.
- Add venue contact info to a “Community Expert” list for future mentorship queries.
This structured approach to field trip planning makes you more than a tour guide. It’s about the intellectual journey you’re creating.
At-Home and Virtual Learning Resources
The screen, often seen as a bad thing, can actually open doors to amazing engineering and global connections. When you can’t go to the clubhouse, your laptop can be your gateway. But, it’s important to choose wisely from the vast digital world.
Not all screen time is the same. I believe in using virtual resources as digital libraries. They offer ideas, specs, and inspiration. But, the real fun and problem-solving happens with hands-on materials.
First, virtual museum tours. Places like the Smithsonian and London’s Science Museum give you a deep look into history. You can see a Corliss steam engine from all sides.
Second, simulation software. Tools like Tinkercad or basic CAD programs let you test designs without wasting materials. It’s a hands-on way to learn STEM.
Third, online forums. Here, the global steam community shares knowledge. It’s a place for specific questions and advice, not just browsing.
Think of browsing virtual resources like reading sheet music. It teaches you the basics. But, building a model is like playing the instrument. You need both to truly create.
This idea connects to “Connecting STEAM and Literacy” strategies. Researching a locomotive online improves reading skills. Sketching a design based on a virtual tour boosts visual literacy. The digital tool helps bridge reading and making.
So, which platforms should you use? Look for ones that make you choose. Software that asks you to pick between a flange or a gasket. Forums that reward detailed answers. These environments foster design thinking.
Your best virtual resources don’t end the learning journey. They give you the plan, the part number, and expert tips. They spark the idea, but you need to bring it to life. Collect your digital parts, then head to the workbench. That’s where the magic happens.
Inclusivity, Permissions, and Risk Management
Our student rocketry club is full of enthusiasm. But we need more than just excitement. We need a strong system for inclusivity, permissions, and risk management.
These three areas are like pillars that hold up your program. If one is weak, the whole thing can fall. But if you get them right, you create a resilient and empowering community.
True accessibility starts with the project brief. A wheelchair ramp is just the beginning. Real inclusivity means designing experiences where every student can use their strengths.
Forget the one-size-fits-all robot. Give options, not a set outcome. Can the coding challenge be met with block-based or text-based programming? Could the final “build” be a physical model, a detailed blueprint, or a digital simulation?
This approach aligns with STEAM research. Make it concrete, not abstract. Tie circuit theory to modifying a guitar pedal. Connect geometry to stage set design. Students learn faster when they see and feel the real-world application.
The last step is personalization. Align student goals and accommodations with project milestones. Does a student with an IEP focusing on collaborative communication have a defined role in the team presentation? This isn’t extra work. It’s effective teaching.
Permissions: Ditch the Legalese, Embrace Clarity
The standard permission form is often confusing. It’s designed to protect the institution, not inform the parent. We need to change this.
Your forms should explain risk, not hide it. Instead of “participant assumes all liability,” say “Students will be using hot glue guns and soldering irons under direct supervision. Here are our safety protocols.”
Being transparent builds trust. It turns a signature into an educational moment. Parents and students understand what they’re signing up for—the excitement and the managed risks.
Risk Management: The Intelligent Workshop vs. The Cotton-Wool Bubble
A safe culture isn’t about eliminating risk. That creates a sterile, cotton-wool bubble where nothing interesting grows. It’s about managing it intelligently and teaching students to assess it themselves.
Compare two environments. The bubble has no tools, no experiments, and no stakes. The well-equipped workshop has clear rules, proper safety gear, and graduated challenges. Students learn to respect the saw because they’re trusted to use it.
Your risk management plan should detail procedures for tools, field trips, and online interactions. More importantly, it should scaffold student-led risk assessment. Before testing the bridge, what could fail? How do we mitigate it?
This transforms liability from a scary specter into a teachable component of engineering and design thinking.
When these three pillars stand together, you achieve something remarkable. You move from merely supervising young people to empowering them. The paperwork isn’t a barrier. It’s the blueprint for a space where every student can safely, and confidently, launch their ideas.
Budgeting: Dues, Travel, Materials, Fundraising Ideas
Funding a student engineering club is like trying to turn water into wine. It’s about making the most of what you have. This means turning limited resources into real learning and maybe even a working engine.
Membership dues are a big part of this. Clubs usually charge between $50 and $150 a year. Before paying, ask if you can try out a meeting first. This way, you avoid wasting money on something that might not work out.
Then, there’s the project itself. A simple Stirling engine kit costs around $80. But, you also need tools and safety gear. These costs keep adding up and can be a big problem.
| Cost Category | Typical Item | Estimated Cost | Notes (The Fine Print) |
|---|---|---|---|
| Core Materials | Stirling Engine Kit | $75 – $100 | The shiny part of the iceberg. |
| Tool Tax | Precision files, digital calipers, safety gear | $120 – $200 | These are club assets, not consumables. A long-term investment. |
| Consumables | Sandpaper, cutting fluid, Loctite | $30 – $50 | The financial phantom that eats small budgets. |
| Logistics | Local field trip transportation | $50 – $150 | Gas, van rental, or public transit fares. Often forgotten. |
| Contingency (10%) | Broken taps, wrong fittings | $30 – $40 | Murphy’s Law has a budget line item. |
Now, you see the total cost. It’s time to think differently. Instead of just asking for money, you’re sharing a story of growth and innovation.
Forget the usual bake sales. Your fundraising should match your mission. Here are some ideas that tell your story:
- “Sponsor a Piston” Campaign: Let donors fund a specific part of your project. Send them a photo of “their piston” in action.
- Public Showcase & Demo: Host a “Steam Saturday.” It’s free, but donations are welcome. Show off your project and share its story.
- Local Hardware Store Partnership: Ask a store manager for material sponsorship. Display a “Proudly Built with Supplies from [Store]” plaque on your project.
- Micro-Grant Writing: Look for local STEM education grants. Your story is your strongest asset.
Budgeting is the backbone of your project. View every dollar as a chapter in your students’ engineering journey. That’s something worth funding.
Partner Projects and Long-Term Mentorship
Think of mentorship as a team effort, not just a lecture. A museum tour can spark interest. But working together for months can really make a difference. We aim to help students grow from helpers to true apprentices.
Use the “Application” and “Link” stages of STEAM as your guide. Instead of just learning, apply what you know. Work with your partner club or museum to plan a big project. Maybe restore a small engine or create a diorama about a historical innovation.
The role of the mentor changes from teacher to partner. They work together with the student on a shared goal. This is like real-world work experience for a 14-year-old.
To make this work, you need a clear plan. Set small, achievable goals and meet regularly. The table below shows how to make this partnership work step by step.
| Phase | Student Role | Mentor Role | Key Deliverable |
|---|---|---|---|
| Discover | Research project history & propose initial ideas. | Provide context, resources, and feasibility feedback. | A one-page project proposal with two possible paths. |
| Design | Create sketches, part lists, and a basic timeline. | Review for safety, accuracy, and suggest optimizations. | Approved design plan and materials checklist. |
| Build | Execute hands-on work, document progress with notes/photos. | Offer hands-on guidance, teach tool use, troubleshoot. | A physically assembled project or completed prototype. |
| Showcase | Prepare presentation, explain the process and science. | Help refine the narrative, provide a venue for display. | A public presentation at the club, museum, or school event. |
To make this partnership official, use the right words. Instead of a “contract,” call it a “project charter.” Make meetings feel like casual chats over pizza, not exams. The mentor’s main job is to guide, not grade.
This apprenticeship benefits both the student and the mentor. The student learns a lot and gets a valuable reference. The mentor gets to see their work through fresh eyes and shape the next generation. It’s a real-world application of classroom learning.
Sample Year Plan: Meetings, Builds, Showcases
A plan without dates is like a boiler without pressure—full of promise but going nowhere. Let’s imagine a school year for a student joining a steam community. This isn’t about strict schedules. It’s about following the natural flow of learning, focus, and sharing that turns dreams into reality.
We’ll follow the STEAM process as our guide. Think of it as an intellectual journey. Each step builds on the last, growing a student’s interest and skills.
This is the beginning. Our student goes to club meetings and open houses. They’re not building anything yet. They’re soaking in the culture, learning about tools, and understanding safety. By November, they’re not just watching. They’re helping with simple tasks.
They start with the basics. They learn to use tools, like tightening bolts without damaging them.
Winter: The Phase of Focus & Detail
The days get shorter, but the project vision gets clearer. The student, now a regular, picks a winter build project. Maybe it’s a small steam engine model. They dive into research, find materials, and learn why certain metals are used.
They start to understand the science behind it. They learn about pressure and why safety valves are important.
Spring: Application and Problem-Solving
Construction is in full swing. This is the messy, exciting phase of application. Things don’t always fit right, and leaks happen. But our student learns a valuable lesson: keep trying. Each problem solved, like fixing a piston or a joint, makes them stronger. The project starts to come together.
Their skills grow fast. They’re not just following instructions. They’re solving problems and finding solutions.
Year-End: Presentation and Link
The final act is the showcase. This could be a club open house, a school STEM night, or a maker fair. The student prepares a talk, shows off their engine, and answers questions. This presentation is key. It helps them connect their work to engineering and history.
Events like the museum services webinars can help teachers plan these events. The student’s pride shines. Their curiosity has turned into something real and a story to tell.
The Narrative Arc in a Nutshell
This year plan has a clear start, middle, and end. The journey is planned:
- Fall (Discovery): Learning and basic safety.
- Winter (Focus): Choosing a project and planning.
- Spring (Application): Building and solving problems.
- Summer/Showcase (Presentation): Sharing and reflecting.
The magic is in the consistent, low-dose exposure over time. A September visit sparks interest. A January planning session adds fuel. April’s troubleshooting fans the flames. By June, you have a fire of interest that keeps growing.
This skill progression—from tool novice to confident presenter—is the real prize. It shows that a structured academic year in a steam community doesn’t just teach engineering. It makes engineers.
Student Portfolio and Reflection Artifacts
Think of your steam engine build as a time capsule for your future self. It’s filled with sketches, failures, and epiphanies. The physical artifact is cool, but its true power is in the learning it represents.
When you pause to ask, “What did I just learn about learning?”, you unlock its power. This is metacognition, the director’s commentary on your own brain’s movie.

We often focus on the final product, like a polished video or a working model. But the metacognitive glue that turns experience into documented expertise is often overlooked. Your build journal, the gear that didn’t fit, and the video where you share your ‘aha!’ moment are all key.
So, what makes a portfolio more than just a slideshow? It’s about the raw, unedited footage.
- Annotated Sketches: Include not just the final design, but the early doodles with your notes.
- Failure Logs: Keep a list of what didn’t work and how you fixed it. This is invaluable.
- Mentor Soundbites: Record and quote advice from mentors that changed your project.
- The Peer-Level Engineering Report: Write a one-pager explaining your project to a teammate. Use real terms.
This collection turns a project into a story of your thinking. It’s the difference between having a guitar and a practice journal.
Remember, this portfolio isn’t just for college admissions. It’s for you, five years from now. It’s a benchmark for your growth. When you face a tough problem later, you can look back and see how you solved a similar issue.
That failed part you kept? It’s not trash. It’s a data point. The final video explanation? It’s you teaching the concept, solidifying it in your mind. This process turns a temporary activity into a lasting cognitive tool.
In the end, the engine might gather dust. But your portfolio remains a living document of your problem-solving journey. It shows not just what you built, but who you became while building it. Start curating it from day one.
Teacher Organizer: Contact Log and Calendar
ou’ve found the coal, lit the fire, and gathered your team. Now, you’re the leader guiding this STEAM community project forward.
A simple contact log is your first step. It’s more than a list — it becomes a living map of your project network. Track who committed to specific tasks and when deadlines are expected. Clear communication helps prevent confusion and keeps everyone aligned.
Next, create an integrated calendar. Coordinate club meetings with science fair deadlines and schedule time for field trips or build sessions. A shared timeline keeps the project moving steadily throughout the year and helps teams stay organized.
Think of this system as the maintenance log for a steam engine. Small updates and consistent tracking keep everything operating smoothly. Similar organizational practices are used in industries that manage complex systems and industrial manufacturing equipment, where careful documentation ensures efficiency, safety, and long-term success.
These tools become your project’s control center. They transform ideas into sustainable initiatives and help teams collaborate effectively. You’re not just organizing tasks — you’re building an environment where creativity, teamwork, and real discovery can thrive.
